Shwmae comrades. I tend to ramble a lot, so if you dont want to read war and peace scroll down to a line break of asterisk to bypass the origin story.
I thought I would share some insight into my recent dabble with leather steering wheel repair and refurbishment.
Bit of context first. My T6 is a startline and came with the plain rubber non multi function steering wheel. It does not have cruise control on the left column switch. It does have MFD control on the right column switch.
I had a mk7 golf Gti TCR steering wheel here earmarked for my golf. I thought I'd try it on the van. It fits, the horn works but as expected none of the multi function buttons do anything due to the control wiring not being in place on the startline, and the Golf being an MQB platform.
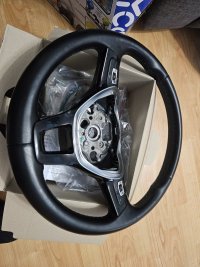
After a few weeks I decided I didn't particularly like the look of the wheel in the van, like a diamond earing on a potato. I was now on the lookout for a T6 leather MFSW full round and not a flat bottom type. Plenty available online in all conditions. So I picked one out of the crowd that didn't look in too bad condition in the pictures, and it had the multi function buttons i wanted. I parted ways with 150 groats including delivery and Pat was knocking my door the next day with a lovely box of man presents.
Unfortunately I'd been catfished. Like the morning after a drunken fumble, without makeup and some natural lighting the wheel showed a lot of ware, wrinkles, and an unsightly gash.
A new dilemma, get it retrimmed? Try one of those self sew retrim skins? I didn't fancy the expense or the wait for a pro retrim. Nor did I fancy spending hours sewing on a "cut to fit" skin that would end up looking baggier than a dry robe.
Google leather steering wheel repair, click videos, spend the next 5 hours watching how to videos with the odd Dyno Fails videos thrown in to keep me awake.
Turns out you can buy leather steering wheel repair kits! So i did. Prime worked it's magic and had it to me in less than 24hrs. £31 the cost.
Sadly I had no intention of making a "how to" video of my own when i started the repair so I didn't take any before pictures of the wheel. But it's pretty straightforward to imagine the steps.
*************************
● Strip down the wheel to its component parts. The buttons/trim part pulls off, its quite tight, take your time and use trim tools so you dont scratch it or break it.
● Thoroughly clean and degrease the wheel.
● Using superglue, fill any scratches or cuts. One of the damaged areas on my wheel had a cut that had created a flap, i glued it back and rolled over it to get it near to original as possible.
● Using 400 grit wet and dry paper (dry) i sanded all the worn areas of the wheel and the glue filled repairs. Run your fingers over the repaired areas with your eyes shut to feel if the repair is noticeable. If it's still proud, keep sanding. If it needs more filling repeat the steps above until it's smooth.
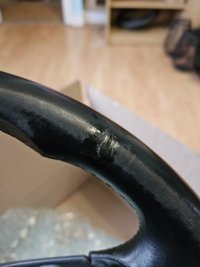
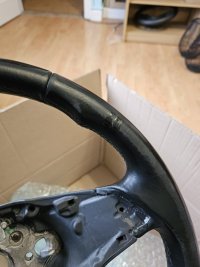
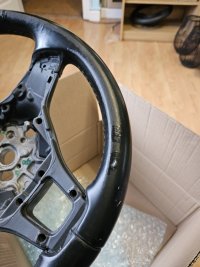
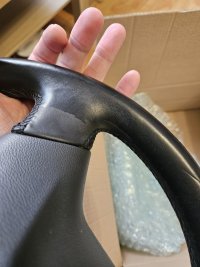
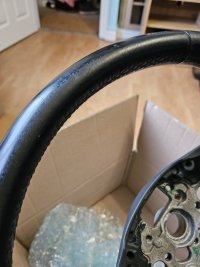
● Now using the repair kit thoroughly clean and degrease the wheel again.
● Apply the black leather dye using the sponge provided, dry between coats with a hair dryer. Build up layers of dye until you are happy with the coverage.
● I gave the wheel a quick going over with some 1200 grit wet and dry (dry) just to knock back the texture left by the sponge.
● After 24hrs apply the sealer included in the kit. I did a few coats of this.
● Once dry, refit the buttons and trim. Then sit back and admire your work. I was so amazed at the end result that i felt compelled to share this with yall.
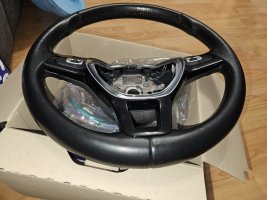
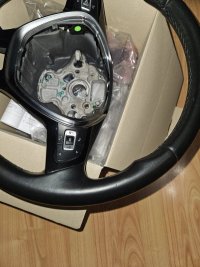
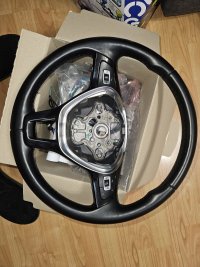
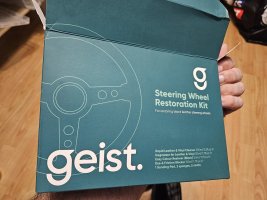
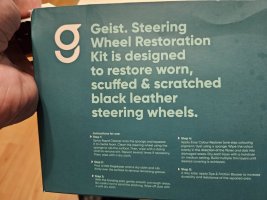
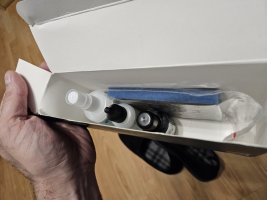
This is the kit i got from Amazon.
I thought I would share some insight into my recent dabble with leather steering wheel repair and refurbishment.
Bit of context first. My T6 is a startline and came with the plain rubber non multi function steering wheel. It does not have cruise control on the left column switch. It does have MFD control on the right column switch.
I had a mk7 golf Gti TCR steering wheel here earmarked for my golf. I thought I'd try it on the van. It fits, the horn works but as expected none of the multi function buttons do anything due to the control wiring not being in place on the startline, and the Golf being an MQB platform.
After a few weeks I decided I didn't particularly like the look of the wheel in the van, like a diamond earing on a potato. I was now on the lookout for a T6 leather MFSW full round and not a flat bottom type. Plenty available online in all conditions. So I picked one out of the crowd that didn't look in too bad condition in the pictures, and it had the multi function buttons i wanted. I parted ways with 150 groats including delivery and Pat was knocking my door the next day with a lovely box of man presents.
Unfortunately I'd been catfished. Like the morning after a drunken fumble, without makeup and some natural lighting the wheel showed a lot of ware, wrinkles, and an unsightly gash.
A new dilemma, get it retrimmed? Try one of those self sew retrim skins? I didn't fancy the expense or the wait for a pro retrim. Nor did I fancy spending hours sewing on a "cut to fit" skin that would end up looking baggier than a dry robe.
Google leather steering wheel repair, click videos, spend the next 5 hours watching how to videos with the odd Dyno Fails videos thrown in to keep me awake.
Turns out you can buy leather steering wheel repair kits! So i did. Prime worked it's magic and had it to me in less than 24hrs. £31 the cost.
Sadly I had no intention of making a "how to" video of my own when i started the repair so I didn't take any before pictures of the wheel. But it's pretty straightforward to imagine the steps.
*************************
● Strip down the wheel to its component parts. The buttons/trim part pulls off, its quite tight, take your time and use trim tools so you dont scratch it or break it.
● Thoroughly clean and degrease the wheel.
● Using superglue, fill any scratches or cuts. One of the damaged areas on my wheel had a cut that had created a flap, i glued it back and rolled over it to get it near to original as possible.
● Using 400 grit wet and dry paper (dry) i sanded all the worn areas of the wheel and the glue filled repairs. Run your fingers over the repaired areas with your eyes shut to feel if the repair is noticeable. If it's still proud, keep sanding. If it needs more filling repeat the steps above until it's smooth.


● Now using the repair kit thoroughly clean and degrease the wheel again.
● Apply the black leather dye using the sponge provided, dry between coats with a hair dryer. Build up layers of dye until you are happy with the coverage.
● I gave the wheel a quick going over with some 1200 grit wet and dry (dry) just to knock back the texture left by the sponge.
● After 24hrs apply the sealer included in the kit. I did a few coats of this.
● Once dry, refit the buttons and trim. Then sit back and admire your work. I was so amazed at the end result that i felt compelled to share this with yall.


This is the kit i got from Amazon.


