6.1 insulating and sound deadening project

minmax89

Member
VIP Member
T6 Pro
Hi,

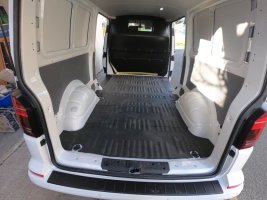
I finally got to start this mammoth project today. The primary plan is to sound deaden my panel van as best I can as I take most of my business calls in it and lower road noise would help improve that. Secondary plan is to also insulate the rear (as a future proofing as I may use it as a day van kinda thing in the future). The van is only a month old. It was ordered without ply lining in the back so I could do this. I will also be plylining and then shelving the load bay for tool storage.

For the most part, my spec is going to be the same as in this video:

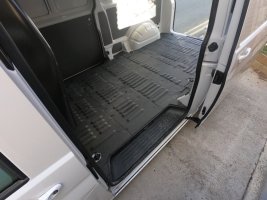
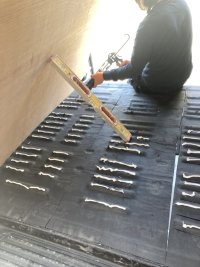
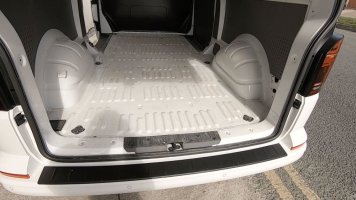
I started yesterday by emptying the van and foolowing a tip I'd read elsewhere, I marked where the raised ribs in the floor where. This is to enable screwing down of the 12mm ply I'm using for the floor. However, I don't like the idea of that so I plan so bond the ply to the top of the insulation...
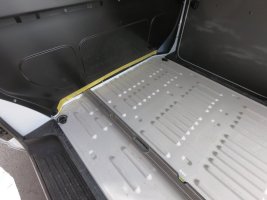
Frame-03-04-2022-10-18-11 (1).jpg

GOPR0325.jpg

GOPR0328.jpg

GOPR0329.jpg

I'm planning to go out and begin creating a template for the 12mm ply floor that I am going to BOND to this dodo mat duo. I will cover the lashing rings as I never used them on my previous T6.

Does anyone have any thoughts on my decision to bond the ply down with a polymer adhesive (gun) as opposed to screwing down? I really ont like the idea of thowing a 100 screws through the metal floor to be exposed on the underside!

Adam
 
Why not make use of the lashing points and use these to fix your ply down? The holes in the floor and fixing’s are there ready for you? I certainly wouldn’t be drilling any holes in the floor as you said…. also I personally wouldn’t risk bonding the ply to the soundproofing/insulation.
 
Last edited:
also I personally wouldn’t risk bonding the ply to the soundproofing/insulation.
Why’s that? If I put a nice bead on every raised rib (and there’s a lot!) I think it will be ok.

I’m going to great lengths this morning to create a detailed template so the plywood will fit snug.
I did think of using the lashing screws/mounting points but I really couldn't see a way of executing this in an uncomplicated way!
 
Last edited:
Why’s that? If I put a nice bead on every raised rib (and there’s a lot!) I think it will be ok.

I’m going to great lengths this morning to create a detailed template so the plywood will fit snug.
I did think of using the lashing screws/mounting points but I really couldn't see a way of executing this in an uncomplicated way!
On the floor in my van I used the Silent Coat sound deadening sheets and then stuck the 6mm Dodo Super Liner to that…. similar to what you’ve done although you say you’ve used the duo. The insulation material pulls away from the adhesive liner quite easily, so that’s why I said I wouldn’t bond to that personally. I know that if your ply floor fits snug it’s not going to ‘get up and run off anywhere’…. especially if you’re putting racking on there too, but I would prefer a mechanical fixing myself so that the plywood cannot lift in the future with difference’s in temperature for example.
I know you said you didn’t use the lashing points on your previous T6, but I use mine all the time and would definitely make use of these in your case for fixing down the ply. Each to their own though I guess?
Yeah sure. All good.
I totally see what you mean. And yes I noticed the isulation does come away from the adhesive liner easily. But even if I was to use the lashings as a form of holding the ply floor down, that would only pin down around the perimeter of the floor, which isn't the vulnerable part in my case as I'll be shelving and that will hold the floor.
So I'm gonna stick to my plan now and if the floor does lift in the middle then I'll have to throw a few screws in but then dress them underneath the van.
I also think I'm going to fibreglass the ply as I do it often to flat roofs and have all the materials & tools for it. (I'm a builder)

Thanks for your reply. I really appreciate you sharing your experience. DId you find the sound deadening helped anyway?
Builder here too mate!:thumbsup:

GRP on the ply sounds good…. it’ll help protect the wood and make it more solid.

The sound deadening, insulation and carpet lining (in my case) really helped in making my van feel more ‘car like’…. I’d definitely do it all again!

Did you keep your banded GP’s? Looking forward to seeing this build progress…. inside and out.
Good stuff! Can be challenging keeping the van looking good when your a builder, but we do hey!
I didn't keep the banded GP's, no. Was a tough decision but they're what sold the van really. It had those and Solows. Was gorgeous. But wanted something different. Nearly went for alloys but I've just ordered a set of 18" banded 'smoothies' from Duchy. They're going Mettalic black with Chrome baby moons. Going for the same width as the GPs (9.5 rear, 9 front). I already have a set of projekt max low coilovers too.

I hoping the van will look amazing. fingers crossed.
 
IMG_5383.JPG

bonded the ply like this.

With this...
1649052412640.png

Then but anything heavy that I could find. This adhesive fully cures in an hour they say so I left it for a few hours. Seems ok so far.

Adam
 
Watching this with interest as have just finished my sound dead, insulation and carpet lining and about to look at doing my floor next.....like the idea of bonding to the dodo, be interested to hear how it holds up.
 
Watching this with interest as have just finished my sound dead, insulation and carpet lining and about to look at doing my floor next.....like the idea of bonding to the dodo, be interested to hear how it holds up.
Yeah me too!

Nuggets of info that may help when you do yours:
I took ages and lots of effort making a snug template for the 3 pieces of 12mm ply I was to use. After cutting the first piece, I dropped it in place and it was quite tight in some areas so I went around with a little off cut of 6mm MDF to scribe a line all around. So it now fits perfect with a 6mm gap all around.
I’ve filled that small, uniform gap with expanding foam where I can to ‘lock’ in the ply a little more.
When I next get time I’ll be fibreglassing the ply with 450g CSM.

Then I can start on the walls…
How’s the floor holding up? Just finished trimming my rear door panels so once they are in I will be making a start on my floor.
 
How’s the floor holding up? Just finished trimming my rear door panels so once they are in I will be making a start on my floor.
Yeah, excellent, thanks! I haven’t gotten round to fibre glassing it yet (next on the list) cos I’m just flat out with work. It has not moved or anything. I really think the foam around the edge helps too.
I’m hoping to do the fibreglass this weekend so will update soon as I do. Then, like you, I’ll be starting on the walls

Adam
 
Watching this with interest as have just finished my sound dead, insulation and carpet lining and about to look at doing my floor next.....like the idea of bonding to the dodo, be interested to hear how it holds up.
Something else I forgot to mention…
I used 3 8x4 sheets of 12mm ply that were run the width of the van. So there’s two joins in the LWB van when laying that way. As I was bonding the ply to Dodo Duo, ie, not a completely hard surface with no give, I took no chances and biscuit jointed the joins. Each join had about 6 biscuits evenly spaced, set in with a bit of gorilla (PU) glue. So to me, it has the strength of one full sheet on the van floor.
I used a Makita palm router, with a trend 1/4” biscuit bit. Worked a treat.
 
Yeah me too!

Nuggets of info that may help when you do yours:
I took ages and lots of effort making a snug template for the 3 pieces of 12mm ply I was to use. After cutting the first piece, I dropped it in place and it was quite tight in some areas so I went around with a little off cut of 6mm MDF to scribe a line all around. So it now fits perfect with a 6mm gap all around.
I’ve filled that small, uniform gap with expanding foam where I can to ‘lock’ in the ply a little more.
When I next get time I’ll be fibreglassing the ply with 450g CSM.

Then I can start on the walls…
what does fibreglassing the ply mean, is it like a paint layer that makes it watertight and adds mold prevention?
 
what does fibreglassing the ply mean, is it like a paint layer that makes it watertight and adds mold prevention?
It means after adding 12mm plywood to the floor, I then fibreglassed the ply.
In detail, this is Polyester resin (roofing resin), fibreglass Matt (450gsm) and then a polyester gel coat finish. I did it solely for the mega hard wearing nature. I can slide stuff in and out, mop it, sweep it, etc. It’s pretty bulletproof. I’m really glad I did it. But I’m a multi trade small builder who keeps a nice van. And as the gell coat gets a little scratched up over the years I can just sand and re-topcoat if I need to.
Only small downside is there is zero ‘grip’ that you might otherwise get from a rubber floor or even ply on it’s own. However I had a ply floor before and a couple of thing gouged into top layers and I couldn’t really fix it.
Basically I also do fibreglass roofing so had all the gear!
 
Back
Top