Van furniture Window Pod Installation

cocky9

Member
T6 Pro
Hi guys,

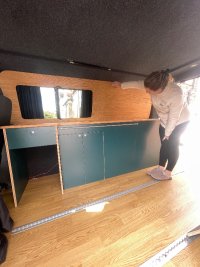
Just wondering if anyone has fitted the Van Furniture window pod? If so how have they gone about it. Van furniture state it needs bonding to 15mm battens but struggling to see where I can securely fit said battens.

I’ve got a Low level kitchen from them and overhead lockers too

Thanks in advance
IMG_2893.jpeg
 
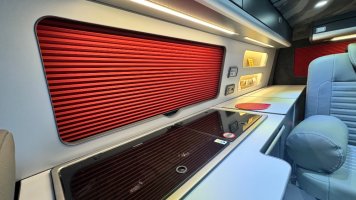
I made my own window splashback don’t think it’ll be much different than when you have. I fixed bottom of down to my worktop with small angle brackets ( inside the window aperture.
The top of the panel fixed to the bodywork of the van the fixings are covered by the overhead locker.

IMG_9162.jpeg

IMG_9165.jpeg
 
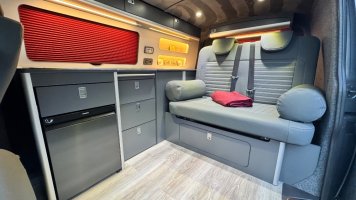
We have a van shades window blind screwed into the window aperture then our van furniture splashback sits on top of the worktop and slides him behind the wardrobe section.

Van furniture told us that we should use 15 mil brackets screw to the body work of the frame and the van and then use adhesive to stick the splashback to those battens.

But that seemed like too much of a permanent fix for my liking so I was going to use Velcro to stick the splashback to it.

In the end as above we use the top lockers to hold it in place and it's held behind the wardrobe so we haven't used any additional fixings.


...

20250504_165403.jpg20250429_192007.jpg20250429_191958.jpg


...
 
Cheers guys. Appreciate it.

I must say I didn’t like the idea of battening and bonding!

I’ll have to have a play around tomorrow. My next concern is if my electrics control panel will have enough clearance behind which I’m really doubting!

So may have to end up fitting that into the kitchen unit which isn’t ideal!
 
The void behind the splashback gets smaller as you go up the van.

So I had to put my deepest parts right at the bottom which was the USB chargers.

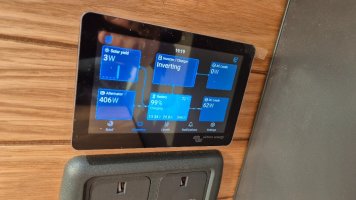
Then we fitted the plug sockets above that and then the viktron screen above that.

Just to the left of my panels is a metal part of the van frame that these splashbacks rested against it's mainly held in place by the lockers at the top to be honest but at least I can put it forward to get behind there to get to cables in future at any point.
 
the splash back doesn't. have to go full back the the van bodywork. I pulled out the bottom so I could house the electrics. I've also formed a light recess with some shelves. there is about 60mm clearance behind it.
 
Both very nice vans!

I presume you had to trim the rear of your overhead cupboards to fit the profile of the top of your van? They’ve come square edged
 
Both very nice vans!

I presume you had to trim the rear of your overhead cupboards to fit the profile of the top of your van? They’ve come square edged
For me yes.

I had to slightly scribe the middle section and the right hand side section as my roof inside trim drops down further as you go towards the rear of the van.

Then use cabinet blocks to fix into the timber along the top and then finally screwed the right hand side into the actual wardrobe section.

My van furniture top lockers had the 12-volt LED downlighters so while the locker was out I routed out a slot in the back edge of the locker to conceal the cable right to the far end.

Then fix it a concealed switch underneath so that I could turn the lights on and off via the semi hidden switch.

My rear wardrobe section from van furniture also had an LED downlighter that I LinkedIn again using a hidden switch.
 
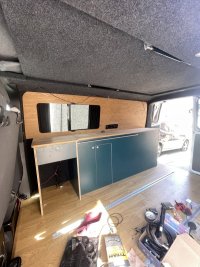
Thanks very much. That’s a job for another day. Bottom half of kitchen fitted and window pod secured!
IMG_2934.jpeg

I think for the price van furnitures kit is pretty good. I’m impressed with the solid oak top
 
Back
Top