T6Ollie's T6 (point 1) kombi to camper self conversion

I've been making good progress on the floor, shout out to @RichyJ91 for his input it has been a massive help!

It was supposed to be completed today but there has been one last issue. Over the course of a few evenings I sanded, rust treated and painted the three screw holes (I know I went OTT on these):

View attachment 327518View attachment 327519

And then I put a blob of sika flex in before putting a rivet in it as well:

View attachment 327520

For the kombi bracket holes I got some aluminium sheet from B&Q and cut some pieces out then attached them with a good good blob of sika as well:

View attachment 327521View attachment 327522

Finally for the tie down bolt holes I picked up these from ebay and secured them with a bit of thread locker:

View attachment 327523View attachment 327524View attachment 327525

The whole floor was then covered in Dodo Deadn Duo. I hated this job, out of everything so far this was the worst job I've done because the stuff is really difficult to work with, it doesn't bend very well and then because of the ridges you have to over size all the pieces otherwise you come up short and it didn't stick between the ridges that well either. Anyway it's all done now, one roll was enough and it will never be seen.

View attachment 327526View attachment 327527

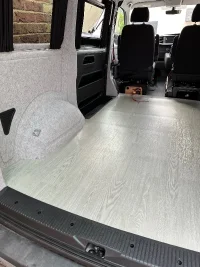
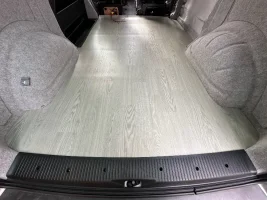
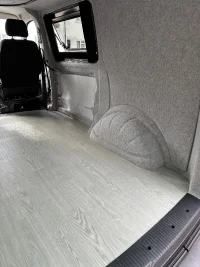
Today we put down the 12mm one piece floor which was cut perfectly, I didn't need to trim it at all but for some reason the rear threshold cover doesn't quite cover the very end, anyone else had this problem? I'll just pack it and cut the altro floor slightly longer.

View attachment 327530View attachment 327531View attachment 327529

The only issue still to be sorted now is the fact that they sent me 2m x 2m when I ordered 2m x 2.5m - d'oh!

View attachment 327528

That’s looking great, man! It’s a seemingly thankless job because it’s a right clart on and you’ll hopefully never see it again, but the benefits are worth it. Good idea on the hole filling too.

Shame about the flooring gap though, very annoying! I think bridging it with altro is a good shout, maybe even pack in something below it to stop it sagging? Make sure you use sufficient/proper adhesive on it as you don’t want it lifting in places over time.
 
I haven't had much time for either working on the van or posting updates the last few weeks however some good progress is being made. The bed is on order, just waiting for an install date now and in the mean time I've finished the floor. Kiravans sent a new piece which was the 2m x 2.5m I needed and we used the 12mm ply floor as a template which meant when we laid the vinyl back in the van it was fractionally too small all the way around so I installed it pushed hard against the near side so that the fixed furniture will cover the gap on the other side, this is how it looked before gluing it down. I also found a slightly deeper rear threshold cover on the Van X website which solved the gap problem!

IMG_4881.webpIMG_4883.webpIMG_4882.webp

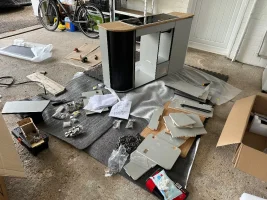
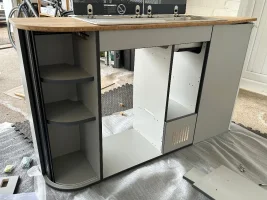
With help from dad we've also managed to start building the units, there are many many parts to an evo kitchen...

IMG_4967.webpIMG_4971.webp

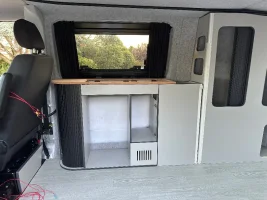
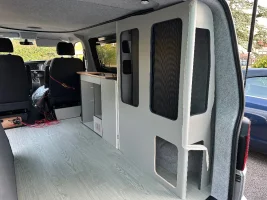
We also couldn't resist seeing how it will look in the van:

IMG_4974.webpIMG_4976.webp

Really happy with it so far, I know it's bland and grey but that's what I wanted!

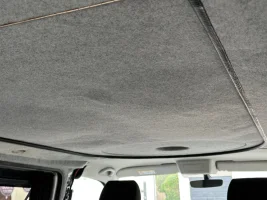
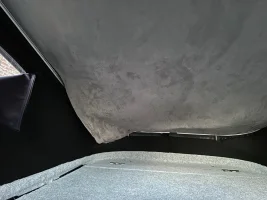
Otherwise, I'm starting to get pretty fed up with my snag list which just seems to keep growing even before I've finished the conversion...The main items so far are the bloody carpet and lining in the pop top is sagging, one of the handles fell off my safari window, the door store rattles like crazy and drivers swivel base creaks over every bump. All fixable but I do wish (especially considering the cost of some of these things) that more stuff just did it's job first time around.

IMG_4890.webpIMG_4904.webp
 
That's looking like such a professional job, man - well done! You can always add colour with the seating, cushions etc if you really wanted to anyway. Shame about all the snags though! Especially with the cost of everything as you say. You'll be away in the van in no time.
 
That's looking like such a professional job, man - well done! You can always add colour with the seating, cushions etc if you really wanted to anyway. Shame about all the snags though! Especially with the cost of everything as you say. You'll be away in the van in no time.

Thanks mate. Yes adding colour with accessories is what I said to the wife when she said it was like 50 shades of grey!
 
Back
Top