My first attempt at anything like this. Thought I’d share some of my experiences and lessons as I couldn’t find anything similar on the forum. Hope it helps someone else.
4m2 of Silent Coat to as much of the wall and roof panels as I could. I tried to cover every nook and cranny and had none left for the wheel arches. Given I’ve not done the floor or cab I could have probably used half as much with the same effect.
10m2 of Dodo Mat 7mm insulation over the Silent Coat. I double layered where I could and used it all. I’m not planning to sleep in the van very often, so I didn’t go mad with insulation and 30% of the van is glass anyway.
I used the fiberboard cards as templates and cut out 6mm ply panels for the two sliding doors, side panels and tailgate. Next time I’d buy pre-cut ply panels as it took a fair bit of time and the holes for the panel pins need to be accurate. I did not cut ply panels for the seatbelts and headliner, I re-used the fiberboard for those.
Test fitted the plywood panels before covering.
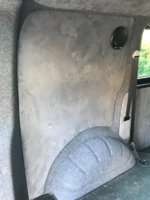
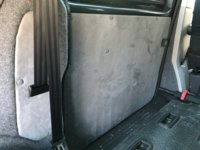
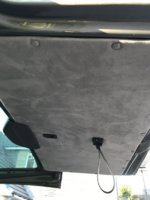
Suede Liner to cover the ply panels, seatbelt and headliner panels, including the joining strip. The larger panels needed a second pair of hands to stretch it and prevent wrinkles. I found that minor wrinkles could be ironed out with the iron on low heat.
Before starting with carpet I removed the wheel jack bracket with a grinder and painted once flush. Jack fits perfectly under the passenger seat.
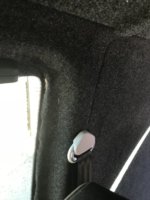
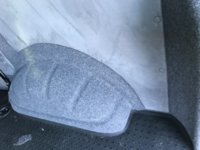
Metal work was covered in Easy Liner using one piece, starting from the B-pillar. Lesson here was to keep the height of the carpet high enough at the back to meet the headliner. Another lesson is that the spray adhesive gets everywhere if it’s windy (windows, seatbelt, wife’s car etc. Still need to try and get it off the seatbelt). Be sure to cover things up more than I did! The carpet needs a fair bit of manipulation, especially round the wheel arch and be careful not to over-stretch it. I’m sure there are better tools, but I mainly used my hands to work the carpet, but the handle of scissors or a screwdriver also proved useful. Once the sides are done, the last piece above the rear door is simple.
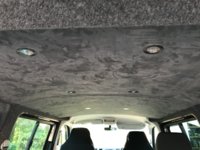
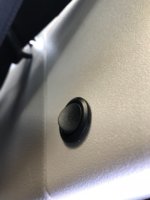
For the LEDs and speakers I got an Auto Electrician to wire everything up for me. He also added a small switch on the B-pillar to turn the lights on without opening the door. Six LED’s in the back is plenty. I didn’t put lights in the tailgate, I kind of wish I had, but they would be shining towards the cab and it’s plenty bright enough with 6 LED’s. I was hoping the rear speakers would balance the sound more so the kids could hear us from the front better, but it doesn’t seem to be as effective as I'd hoped. Need to figure out how to increase the balance to the rear more.
Installing the covered panels requires you to find and cut/drill out all the necessary holes for the panel fixings in both the panels and the metalwork. I opted not to use hidden clips. The longer fixings I got were heavy duty and hard work to fit, often requiring some persuasion with a rubber mallet. Be careful with the 90deg brackets for the side panels, they are not very strong. The headliner was a pain and needed a second pair of hands to get them in. I had to drill out the female part of the clips for the jointing trim for the headliner to install the longer clips.
Finished off with a VW logo'd cab mat.
Quantities:
7m Easy Liner
9m Suede Liner
I'd have gotten away with 1m less for both, but I wanted to have a little extra for re-doing a panel.
Plenty tins of adhesive spray
Extra long panel clips for panels and for headliner trim
I also needed to buy a spline bit set for removing the seatbelts and the D-rings from the floor.
A set of panel trim tools proved to be invaluable for removing panel clips and B-pillar trim.
Overall: I’m pleased with the result. It was more work and took longer than I anticipated, but I’d do it again with pre-cut panels and next time I’d attach the panels with Velcro. I think this would give a cleaner finish whilst retaining the ability to get the panels off …. and …. it would also he a hell of a lot easier and quicker!


