T6 Midroof LWB Wheelchair Campervan Build

It was $2100 AUD, a hell of a lot of money, but then a decent set of AGMs are between $800-1000

But in return, over the 280 ah AGM's, i get a 49Kg weight saving and 192 usable amps if i stick to 20% depth of discharge over the usable 140 amp in the AGM

Faster charging, able to take the surge of the induction cooker via the inverter and also the extra load of the 12 volt 6 litre water heater that i didn't plan on

Off grid is what i wanted, and this with solar should help
 
yup, OUCH, i can only see the price dropping further.

12-18 months ago, a 200 ah Lithium were around 3K, so in a few more years they will be more affordable

I'd like to think this battery will outlast the van if treated right, as it should last three times as long as AGM's

time will tell
 
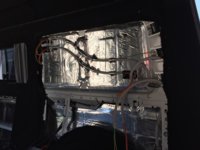
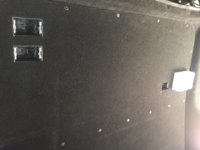
Well, haven't done a lot apart from fitting the 230 volt system and cutting access holes in the tank.

The upper point is for the Inverter and the lower two points are mains, running the 230 volt inverter feed through a RCD as well
IMG_1974.JPG

Just waiting for the Sparky to look at it before i put the panel back on.

My conduit or the rear power point housings enclosures aren't going anywhere as i had some spare Sikaflex FC11 that i had to use up, so that and the VHB double side tape has done the job

As for the water tank, I applied Aqua Expoy to the internal areas where the pin leaks are and Sikaflex on the out side.

Ill test it tomorrow and see what happens:rolleyes:
 
So today was the big day for a test.

It failed :oops: , so i spend the morning getting more quotes for a SS tank.

Too be fair, even it hadn't failed, i don't trust this tank not to crack off road and split, 80 plus litres of water flowing through the camper isn't my idea of fun.
 
So today was the big day for a test.

It failed :oops: , so i spend the morning getting more quotes for a SS tank.

Too be fair, even it hadn't failed, i don't trust this tank not to crack off road and split, 80 plus litres of water flowing through the camper isn't my idea of fun.

Is your van a 4x4 Bryn ?.... if not fit a protected tank to the underside ?
 
I've got a wheelchair lift under the van, thats why the underfloor CAK tanks i had didn't fit.

Im still using the CAK waste water tank, and I've got a spare tire fitted, you can't get away without a spare here
 
Well, just a little update,

The sparky came and terminated the power points and circuits so i could get an electrical certificate, so thats all done.

Inverter and mains both have their own RCD
IMG_1970.JPG
IMG_1985.JPG

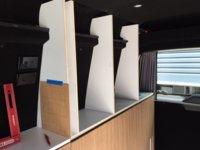
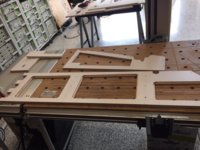
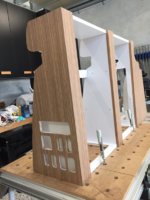
Started to work on the wardrobe

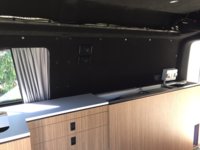
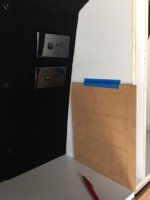
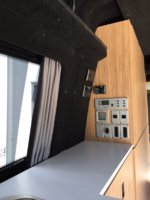
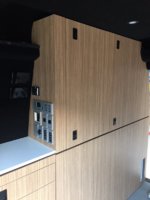
Its not the easiest design, but i,ve got a small cavity to enable me to recess the Votronic Jupiter panel and Votronic inverter panel and Votronic switches and chase the wires so they can't be seen.

I've also got to trial fit the Sirocco fan

IMG_2026.JPG

Also need to router out the opening for all the switches and panels, before i laminate it

IMG_2019.JPG


I also need to router out some removable access openings for the electrical area and the cavity area and then drill some adjustable shelf holes.

Still have to scribe the rear angled panel, that can be a job for tomorrow.

I ended up outsourcing a SS water tank, so i should see that in a few weeks.
 
Looking good Bryn. :thumbsup:

As far as the tank goes, well at least you gave your own design a shot. I had my doubts about the plastic wondering if it was liable to cracking over time, at least you won’t have those concerns with SS.

Love the units:cool:
 
Cheers Oldrat, i should have trusted my gut and got a SS tank from the start, but i wanted to try welding a plastic tank.
 
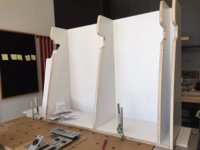
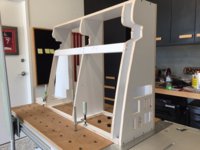
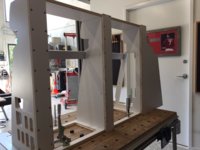
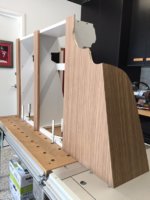
so after a little more scribbing, i temporary screwed the cabinet together.

I have to install a mid mounted rail for screwing into the rivnuts and also a top rail.

IMG_2029.JPG IMG_2031.JPG

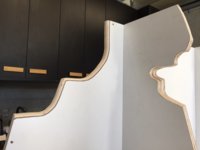
The dremal came in handy as the last rib had to be contoured from 15-60 degrees in places

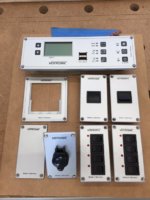
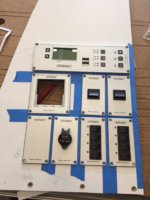
Started to have another look at how to set out my panels and switches.

IMG_2028.JPG

I still have to install the 20 amp 12 volt socket into the blank fitting, and the panel without a centre is for the inverter, i just have to unscrew the display panel of the inverter and install it in the panel.

I'll look at routing these into the side of the wardrobe next week
 
still plodding along,

Got the access holes and cable holes routered, shelf pins hole drilled, top and mid rails edged.

Just need to get around to gluing up the wardrobe together this week.

IMG_2034.JPG
 
been a busy week, but i manage to get some time into gluing up the cabinet, after i cut out the holes for the votronic gear.

IMG_2036.JPG

I can see myself spending a lot of time, getting them in the perfect place so all the gaps a equal before drilling pilot holes.

IMG_2037.JPG IMG_2038.JPG

Just need to find some time to edge the cabinet before i start laminating
 
Still podding along, although today was a bit of a letdown,

I got given a crazy price IMO to drop the lift to access the diesel tank for my heater install and then the company that has/was making my water tank out of SS, rang today and said that it was too hard for him.

So after they had my HDPE template for almost 4 weeks and was given that as a time frame for completion and i was expecting to pick it up on Friday :mad:, i can't say i'm happy, but what to you do

Anyhow, i got the wardrobe edged and laminated, just have to trim and edge the doors tomorrow and i can look at fitting them.

IMG_2051.JPG IMG_2053.JPG
 
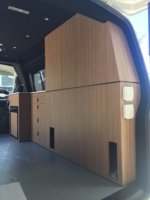
Got the upper wardrobe cabinet fitted and bolted in over the weekend.

IMG_2059.JPG

IMG_2063.JPG

Trial fitted and screwed on the Votronic panel, switches and the diesel controller today, spent a lot of time, getting the panels lined up parallel and equal spaced, double sided tape is handy for these things.

Tomorrow, i'll start on routing and fitting the Evo cabinet Latches, then i have to rebate and edge the back of the door a little as i want to to be perfectly flat when latched.

The timber grain, line ups perfectly on both the wardrobe units
 
Well thats me done for the next 6 weeks, we are moving, so that with tiding up the new and old place will keep me busy.

So i decided to crack on and rebate and edge the rear of the doors to allow flush fitting when closed, routered out the Evo Latches and fitted them.

I went with the double latches, one top and bottom as the doors are long and i wanted a tight lock door with no rattles

IMG_2067.JPG

Finally settled on a new tank manufacturer, all these guys do is SS tank welding, the beer vats they are making look good.

So the template goes back to them tomorrow and in 2-3 weeks i should have a water tank ready for me to install in November
 
Cool job fella, looking very neat and up to your usual high standard Bryn.

Good luck with the move :thumbsup:
 
Well thats me done for the next 6 weeks, we are moving, so that with tiding up the new and old place will keep me busy.

So i decided to crack on and rebate and edge the rear of the doors to allow flush fitting when closed, routered out the Evo Latches and fitted them.

I went with the double latches, one top and bottom as the doors are long and i wanted a tight lock door with no rattles

View attachment 29117

Finally settled on a new tank manufacturer, all these guys do is SS tank welding, the beer vats they are making look good.

So the template goes back to them tomorrow and in 2-3 weeks i should have a water tank ready for me to install in November


Love those flush fitting latches, superb job you are doing.
All the very best with the move & look forward to updates when you’re ready
 
Back
Top