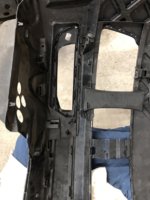
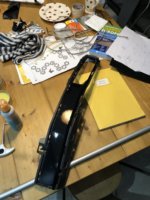
So the wrapping was a fiddle, made carpeting the inside look easy! But all done!
52EE1E9D-19FB-4524-8EFE-C3CBA3FDF15A.jpeg

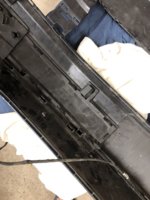
These are pretty tricky to get back into the bumper without marking them but worth the effort.
387AA7EA-4474-4DCB-A96B-1746F59EE4F9.jpeg

2ABF5B62-233F-404D-B105-27D8875BD352.jpeg

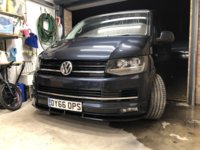
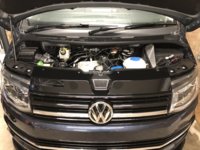
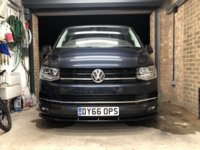
So the final part was just dropping all the finished parts back on the van. I’m pretty pleased with it look wise, jury is out on the lower chrome strip though. I thought it would break it up a little. It may get swapped for gloss black but will think about it for a while.
1F27BC88-D633-45D3-A1F8-38C5DB676869.jpeg

1283A34F-A934-483D-BDC2-293B4FEB0538.jpeg

45CDF520-4AD6-447B-A977-6791CA68BE0D.jpeg

The lights are definitely an improvement look and output wise. I went for the whiter bulbs from THQ but may still look at getting something brighter or some LED H7’s but at least there are options available now over the H4’s. I will probably get them coded too so that the main and dipped beam stay on together, THQ advised this was the best option rather than the conversion looms for reliability.

Will get some better pictures at some point with the running but was late on by the time I finished.
 
Just seen this thread and read it in one go. Brilliant from start to finish and looks fantastic. You certainly know your stuff. thanks for sharing :thumbsup:
 
Just seen this thread and read it in one go. Brilliant from start to finish and looks fantastic. You certainly know your stuff. thanks for sharing :thumbsup:

Thanks a lot, the van works really well for us! Always little additions to be made though!

The forum is where the knowledge comes from, very useful indeed.
 
Thanks a lot, the van works really well for us! Always little additions to be made though!

The forum is where the knowledge comes from, very useful indeed.
Great thread and your van look awesome! Did you buy the gloss black grills from THQ ?
 
Great thread and your van look awesome! Did you buy the gloss black grills from THQ ?

Grills came from vanstyle as they were the only ones to do the black/chrome combination I wanted. For the money I would have hoped they would be gloss black ABS but they are still just painted ones.

They do fit well though, look the part and so much easier to keep clean. Just need to have the mirrors/skuttle panel and side repeaters painted to match now though!
 
Just wondering how the wrapped lower (ie. fog light) gloss black panels are holding up? Still look good? I need to do mine as the rest is gloss.
 
Just wondering how the wrapped lower (ie. fog light) gloss black panels are holding up? Still look good? I need to do mine as the rest is gloss.

They have not been affected by stone rash much but have only done 2k miles since. The film has lifted a little in one of the tight corners but to be expected as textured plastic isn’t ideal for wrapping. I will def paint them eventually.

Its strange Travelinlite do them in gloss black but only with sensor holes.

Cheers.
Yes, looks like travelinlite is the only other (off the shelf) option, but with sensors. As on another post I may end up just buying them then and adding some sensors (which I'd actually like to get working, in the future).
 
Great work! Any tips on carpet lining in one piece?

Thanks :thumbsup:

One piece carpet lining.........well lots of patience and two pairs of hands are definitely needed. The trickiest part for us was the top pillars around the tailgate. It’s very easy to end up short at the top and the carpet really need manipulating around the various curves. We found some areas really tight and others had excess to work out, a little heat from a hairdryer helps.

One piece does look smart but I tested a joint before we started and it’s near invisible. Worst case scenario you can cut and bale/bail (never know which) out when you reach the tailgate.
Thanks, mate, may give it a try and just take my time! I have done it before with a tailgate join but not in one piece which is what I want to try.
 
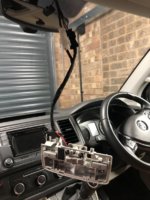
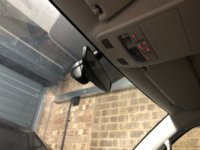
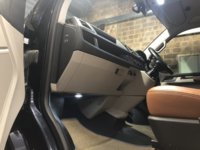
I have been making a few tweeks to the cab lighting over the last few days. I fitted some footwell lights a while back but when camping they they would be on and off all the time being on the courtesy light circuit.

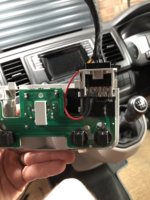
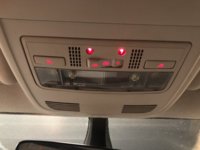
So like a few others have done I went for a W8 light with the ambient lighting integral cheers @T6180 The plan for this is to make the switch on this unit switch the footwell lights also so they can be isolated when not wanted. I may well add some puddle lights from the same point when I get time.

So with the W8 loom adaptor I added an additional cable and found a switched negative on the circuit board. I soldered this direct on and then added an additional multiplug to allow removal if needed. I also ran another core connected to the ambient switch illumination circuit for the ambient LED’s, these dim up and down with everything else now.

With the right crimp you could actually add another pin to the W8 connector/adaptor at that connection there is spare way in the plug. Unfortunately I didn’t have any in stock.

FAEB0D38-6B9D-4520-84C6-BCF7C3A69B42.jpeg


1BAF2ED1-D138-4AD4-A713-AA3B41DBA7EF.jpeg

With this I added some LED lamps that I had and the output is very good. The ambient gives a nice glow as per other VAG cars.

43820454-A24D-43FE-B45F-05C2192F4D10.jpeg

B796E8F8-5376-4824-B87F-874BBD0577AE.jpeg

Switch works well and switches the footwell nicely on door open or permanent with it still timing out when required.

B5D67C52-726D-40DA-B245-36964E52FA0A.jpeg

ECC639A0-01D8-45E4-8F12-E2A13C58C576.jpeg

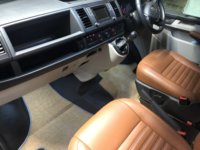
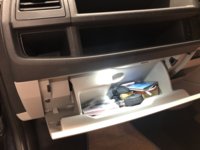
Also added a glovebox light whilst in bits, thanks @saxoboy I wired this into the fuse box with the correct crimp and additional fuse. Negative picked up from the chassis post just behind the cab mat on the left, really easy fit.

7EA9CE1A-FCA0-4EB2-A7B5-BF0F3C17EBFA.jpeg

Might do the puddle lights next, would be nice if there is a spare way in the door multiplugs so I can sent the switched negative through one of them and look factory. Would just need to find the correct male/female fittings.........that could be fun.
 
Might do the puddle lights next, would be nice if there is a spare way in the door multiplugs so I can sent the switched negative through one of them and look factory. Would just need to find the correct male/female fittings.........that could be fun.

From memory, I’m sure there are some vacant terminals in the multiplugs.
 
From memory, I’m sure there are some vacant terminals in the multiplugs.

I think you are right, don’t know why I didn’t look more carefully when I had it in pieces:thumbsdown:

Just need the terminals then.
 
Nice build, quite refreshing to see your interior. It's good to be different and it definitely works.
I too searched for the same spec van but in the kombi. After 14 months searching ended up having to order one new. It's safe to say some combinations are like rocking horse shit.

Keep up the good work.
 
Great thread, just read the whole thing. I'm not sure how I missed it it! Van looks brilliant, love all the DIY and the colour choices work perfectly.:cool:
 
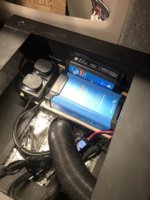
With the van being parked up at the moment it got me thinking about the starter battery and maintaining it. The van is for weekend and holiday use only as have something else as a daily. But normally longest it will get left is 2-3 weeks. The battery can be a little slow at turning the starter even at that. So a starter charger/optimiser was in order.

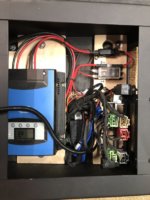
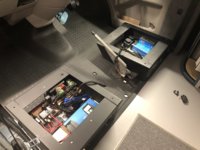
So whipped the seats out to uncover my original setup:

A2732903-E33F-475E-8300-C5345DD7BAD9.jpeg

44CC4231-632B-42CB-B525-C3F8EDC28E6C.jpeg

So the 30a Victron charges twin leisure batteries and works like a charm. My Victron obsession has begun so another smaller Victron was ordered. Just a 5a ip rated one as they are such good value.

The only issue I came up with is the Ring DC30 DCDC charger I’m running doesn’t require an ignition feed to run. Thus meaning if I charge the starter it will kick the B2B in and try to charge the leisure batteries. Don’t think the 5a charger would like that much.

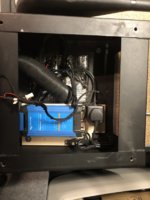
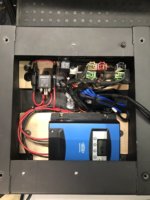
So as part of the setup I have added a relay on the supply to the B2B. This is switched via the ignition from the van, I ran a cable from the fuse box centre row and added an additional 5a fuse. So the B2B will only run when the van is running separating the two when at rest.

575B93E4-1A00-4F9E-BECB-CDE914C4CF8C.jpeg

I ran the positive from the charger to the post on the relay as this connects via a series of fuses back to the starter in 10mm. This goes under the van mat with the rest of the loom.

At the drivers side I already had a 230v socket on its own circuit for the charger. I just added another CBE socket for the starter charger. I have also adjusted the leads on the charger so the 12v plug arrangement is under the drivers seat. I can the unplug the charger from the loom directly connected to the van.

E34743B0-4FE5-4AEC-9624-51BFACFA4EF9.jpeg

D647D6BA-BC7C-4798-ACB9-F9FCD39BFD9F.jpeg

As usual this can all be viewed on the VictronConnect app, very nice. Hopefully that should cure any battery issues going forward!:thumbsup:

F9384D77-8DC6-449D-8425-9BE8C45388AC.png
 
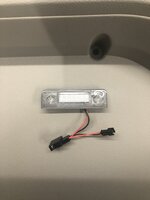
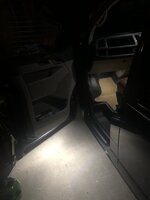
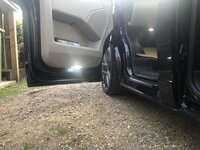
Been busy adding some puddle lights in the doors, just wanted some simple LEDs so spent a bit of time looking at options. Found that Skoda number plate lights seemed to fit the bill. Good value at under a tenner and very slim.

BCB5D570-F81C-4708-BBEE-EDEADA454BC4.jpeg

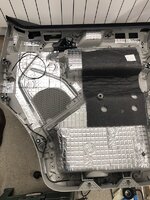
So small hole trimmed in the door card with the trusty dremel.
C3A290BB-0A99-466B-9147-CA36780DF4C9.jpeg

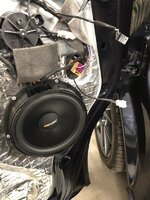
I cut the connectors off of the lights and soldered/extended the cables to the top of the door card where I positioned a multi plug so that the door card can easily be removed.

29AEB123-BB25-4497-B8E2-4E2EDE1BC65A.jpeg

I ran the wiring from my footwell light circuit which has a switched neg from the W8 switch so again these can be controlled. You can see the female multi plug where the factory plug is just above the speaker.

C5D37949-83CF-4D4C-AE73-0DC7970654B2.jpeg

And job done, pretty pleased for about £10 all in.:thumbsup:

4C51F547-927A-4665-92AC-4716112B1C3C.jpeg

1DE41F4A-D99D-4D2E-A641-2AC7BB8477B0.jpeg
 
Back
Top