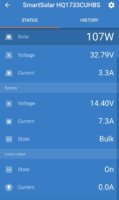
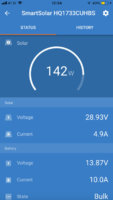
To save cluttering up @Deaky 's thread any more than I have done, I've split what I'm doing into a separate thread as it seems having a front hinged (i.e. roof higher at the back) setup presents some different challenges for cabling into the van and hopefully anyone attempting this in the future can find this and either do the same, or make sure they avoid everything I do cos it ends up as a complete cock up.
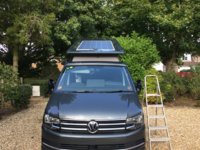
I really don't want a cable gland on top of the roof as it will look ugly and raise the height by 40-50mm, meaning I'd be back above the 2m line. Another alternative was to pass the wires through grommets in the roof and then cut, and somehow seal, a hole to pass it through into the canvas, which makes me nervous.
After lying awake all night and taking a quick few measurements before work this morn then a longer look now, I think I've come up with a workable solution that will avoid both the above problems.
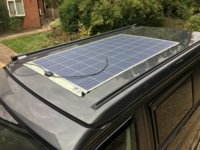
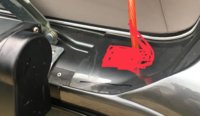
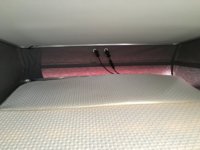
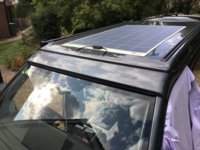
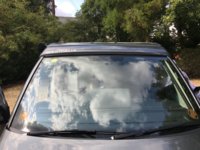
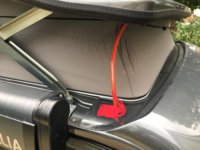
On the photos below, the red lines/piece of red wire indicate where I'm routing the cables.
I know, it's hard to believe I'm not a professional draughtsman...
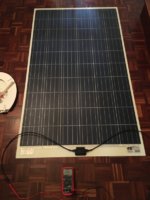
So the first bit will be to take the 2 cables coming from the front of the solar panel, run them both into a single piece of braided sleeving and pass that through a grommet at the front centre of the roof. I've done 2 squiggles but there will only be 1 hole. And it'll be a bit further back. Just ignore the marks...
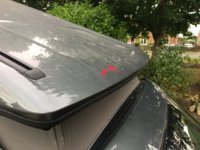
The braided sleeving will be secured above and below by cable ties to prevent strain on the panel connection. Once through the roof, the cable will run up inside the lip along to the driver's side front corner. My plan would be to bond cable clips to the inside of the roof and use these to secure it, rather than bond the cable itself, or use screw fastenings. It will then loop over to the canvas at that corner where it will tuck behind the bungee and continue downwards. This loop will fold in with the canvas, I've tested it. One annoyance is that the pre-attached cable of the panel is only 0.9m long, meaning I'll have to connect the extension cables, with MC4 connectors, under the roof lip.
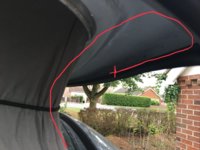
From there it will exit the braided sleeving, again secured by cable tie, to separate back into the separate cables to enter into a double gland. I know I said I didn't want one, but this will not add to the height, will be covered when the roof is down, and in fact will be barely visible from the ground when the roof is up. In addition I'll paint it to match the van. The position I've marked has just under 60mm clearance (and is the only place that does) so the gland will fit without being crushed.
Although the detailed drawing shows the cable entering the front of the gland, I'm going to experiment when it's all in place to see which angle most reduces the strain on the cable entry. I suspect a 45º angle will work better..
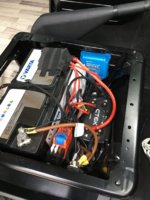
From there, the disadvantages of the roof become advantages, the cables come through the roof close to the sunglass holder and will easily route along the top of the window and down the B pillar to the charge controller under the driver's seat.
Any comments, suggestions, or howls of derision welcome
I really don't want a cable gland on top of the roof as it will look ugly and raise the height by 40-50mm, meaning I'd be back above the 2m line. Another alternative was to pass the wires through grommets in the roof and then cut, and somehow seal, a hole to pass it through into the canvas, which makes me nervous.
After lying awake all night and taking a quick few measurements before work this morn then a longer look now, I think I've come up with a workable solution that will avoid both the above problems.
On the photos below, the red lines/piece of red wire indicate where I'm routing the cables.
I know, it's hard to believe I'm not a professional draughtsman...
So the first bit will be to take the 2 cables coming from the front of the solar panel, run them both into a single piece of braided sleeving and pass that through a grommet at the front centre of the roof. I've done 2 squiggles but there will only be 1 hole. And it'll be a bit further back. Just ignore the marks...

The braided sleeving will be secured above and below by cable ties to prevent strain on the panel connection. Once through the roof, the cable will run up inside the lip along to the driver's side front corner. My plan would be to bond cable clips to the inside of the roof and use these to secure it, rather than bond the cable itself, or use screw fastenings. It will then loop over to the canvas at that corner where it will tuck behind the bungee and continue downwards. This loop will fold in with the canvas, I've tested it. One annoyance is that the pre-attached cable of the panel is only 0.9m long, meaning I'll have to connect the extension cables, with MC4 connectors, under the roof lip.

From there it will exit the braided sleeving, again secured by cable tie, to separate back into the separate cables to enter into a double gland. I know I said I didn't want one, but this will not add to the height, will be covered when the roof is down, and in fact will be barely visible from the ground when the roof is up. In addition I'll paint it to match the van. The position I've marked has just under 60mm clearance (and is the only place that does) so the gland will fit without being crushed.

Although the detailed drawing shows the cable entering the front of the gland, I'm going to experiment when it's all in place to see which angle most reduces the strain on the cable entry. I suspect a 45º angle will work better..
From there, the disadvantages of the roof become advantages, the cables come through the roof close to the sunglass holder and will easily route along the top of the window and down the B pillar to the charge controller under the driver's seat.
Any comments, suggestions, or howls of derision welcome

Last edited:

