@rod_vw - when you say this, do you mean out the side of the driver's seat base in front of the hand brake? With my driver's seat base full of LBatt etc at the rear, and a fridge directly behind, I'm thinking warm air out the side of the driver's seat base, or routed under the van to the passenger seat base (though picturing the exhaust being an issue).You should be able to 'squirt' the hot air out backwards from the inner part of the aperture in the right seat base. I've got a Waeco CRX65 as the front item in the kitchen fitments and if pressed I recon that would work OK.
You are using an out of date browser. It may not display this or other websites correctly.
You should upgrade or use an alternative browser.
You should upgrade or use an alternative browser.
Night Heater location - internal or external??
- Thread starter hoggle
- Start date
Yes I did get it finished.@Jim Rey - Did you get this finished, and how noisy is it please?
The fan isn't too loud and it quietens when it get up to the temperature set by digital thermostat. I do hear the dosing pump but I chose to initially place it beside the heater unit for the time being. I might relocate this under the van next Spring which is when I am thinking about dropping fuel tank to fit fuel supply to sender unit.
I am reluctant to do this for the time being as on the T6, I have the AdBlue tank connections to consider. I'm hoping at some point for someone to do a Youtube video showing a standpipe getting fitted to the main diesel tank and show how the aDBlue inlet is dealt with when fitting this.
I meant out backwards but you have a battery in the way for that. I have managed to route an outlet under the floor to the left side on previous conversions but it means modifying the heat shield over the exhaust which is not easy. I also found that having extra tube and bends the resistance to air flow was too high without using the next size up tube and outlet on the heater.@rod_vw - when you say this, do you mean out the side of the driver's seat base in front of the hand brake? With my driver's seat base full of LBatt etc at the rear, and a fridge directly behind, I'm thinking warm air out the side of the driver's seat base, or routed under the van to the passenger seat base (though picturing the exhaust being an issue).
I too have a fridge immediately behind the right front seat but think I could direct hot air backwards sufficiently away from the fridge without problem. I'll have to try that if I convert a T6.1 as my current method of fitting the heater under the left side is now filled by the adblue tank.
I put the heater underbody on drivers side and ducted across to passenger side under seat as l have a battery and fridge on driver side.
Kept ducting as straight as possible and put insulation on exposed ductwork.
Went over exhaust pipe which I lagged with exhaust wrap.
Works fine with no issues. I dont have ad blue tank.
Put duct through heat shield.


Kept ducting as straight as possible and put insulation on exposed ductwork.
Went over exhaust pipe which I lagged with exhaust wrap.
Works fine with no issues. I dont have ad blue tank.
Put duct through heat shield.
Just taken off my under trays for a look. I have a dummy adblue tank shaped from polystyrene, which the undertray attaches to. I have the blanked off hole for the filler below the fuel filler, but no pipes obviously. Ordered a new undertray cover for drivers side as mine was smashed, presumably by hitting deep water? £70 from TPS.
yes I saw the Kiravans install a while ago, which was helpful but it was a T5 and no Adblue. The tank drop should be OK but the AdBlue nozzle and connections I haven't seen anyone doing this on Youtube. As I say, no hurry, I will tackle it next Spring I think
just saw this post so might not be that difficult. Fitting Eberspacher D2 - My Experience
Interested in some controller knowledge regarding a similar installation into a gasoline T6:
I own a VW T6 California Beach without a built-in parking heater. It is from 2017. I have recently purchased an Original VW T6 Eberspächer Airtronic M B3 Plus heater from 2015. It comes with a connector for the VW T6 Transporter to control it.
I now need to know if I could control this unit with an Eberspächer temperature controller. I was thinking of getting an Eberspächer EASYSTART REMOTE+. Will this work with this Airtronic M B3 Plus heater? What wiring changes are necessary: the Airtronic M B3 Plus has an 8-pin VW connector on it.
Thank you for any information or specifications about the units.
I managed to lower my tank by just lifting the adblue nozzle off it’s threads but it was a tight squeeze.yes I saw the Kiravans install a while ago, which was helpful but it was a T5 and no Adblue. The tank drop should be OK but the AdBlue nozzle and connections I haven't seen anyone doing this on Youtube. As I say, no hurry, I will tackle it next Spring I think
To refit the tank I removed the adblue nozzle completely which was simple and in hindsight I should have done this for the tank removal. Just make sure your adblue tank is not full before removing the nozzle.
Not sure if this is of any use but, i fit the stand pipe in the sender unit ..van on ramps at front, fuel tank down to 5 mls range, trolley jack under tank, remove tank filler cover and release fuel tank filler and lift the adblue filler off the studs, remove straps lower tank on an angle, unclip the fuel lines on the tank two or 3 clips length of tank (with clip for heater fuel line), i left the sender unit pipe connections (2) on but removed the electrical connection, undid the sender unit ring lift the sender unit out,(dont bend the float) tipping the fuel into the tank, wrap the unit in tissue and drill in position, fit stand pipe and reverse to re fit..... check fuel gauge works and engine runs before reassembly, if engine runs in limp home mode 2500rpm, top up fuel tank and take for a run. hope this helps.
Northerntig
New Member
Good morning, we collect our new t6 conversion next week. The diesel heater is located under the rock & roll bed. Has anyone else had experience of this? We are wondering how to protect the heater from being knocked/moved particularly as this area will be used for storage of items. Has anyone made some type of vented boxing? Thanks in advance
Check the manual for the heater, there are minimum distances for boxing in. The heaters casing main heat develops on switch off as all the residual heat from the exchanger is emitted. That said the heaters are sturdy beasts and can take a lot of knocks. The heater will not move as it is bolted through the floor!
Work to the removal space requirements eg Webasto 2000STC ( This gives 20mm each side, top will be the same):

Work to the removal space requirements eg Webasto 2000STC ( This gives 20mm each side, top will be the same):
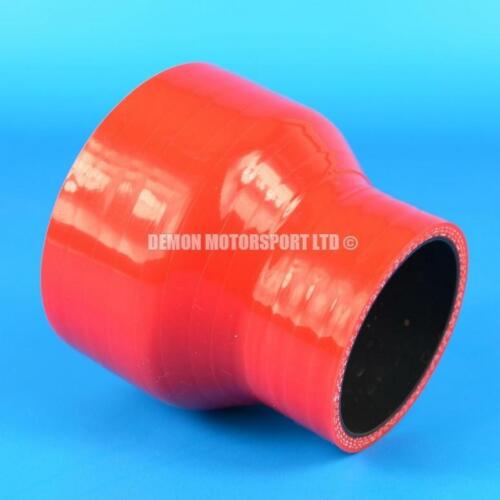
Can you remember what size spaces you made/used and where do I get the silicone reducers? I just about to do the same but with an airtronic d2. ThanksThis is a chinese 2kW heater fitted to the California heater mount that is now fitted beneath my van.
I had to add some spacers between the cradle and the heater to centralise the inlet/outlet with the california ducts, then used silicone hose reducers to join them together.
Once fitted beneath the driver's seat and with the van underguards refitted it is out of the worst of the weather, no problems in over a year.View attachment 75910
I coated the circuit board with a spray on plastic PCB conformal coating, and sprayed the casing black to both protect from corrosion and try to get some more heat out of it.
View attachment 75911View attachment 75912
I seem to remember using some long studding connector nuts as the spacers,
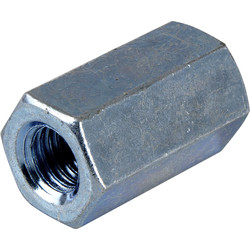 with a longer bolt to account for the extra depth.
One thing I do remember doing is cutting down the mounting plate so it would clamp the silicone seal to the heater case when fitted in the mounting cradle, the plate is sandwiched between the spacer nuts and the silicone gasket.
It was a bit awkward to get the spacers in with using the bolts, maybe some studding would make it easier.

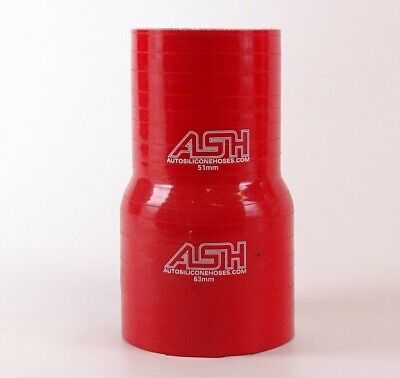
Hoses were from AutoSiliconeHose off ebay for the rear/hot air side one and demon-m off ebay for the front/cool air side one, they are two different reducer sizes, which I can't remember at the moment.

One thing I do remember doing is cutting down the mounting plate so it would clamp the silicone seal to the heater case when fitted in the mounting cradle, the plate is sandwiched between the spacer nuts and the silicone gasket.
It was a bit awkward to get the spacers in with using the bolts, maybe some studding would make it easier.
Hoses were from AutoSiliconeHose off ebay for the rear/hot air side one and demon-m off ebay for the front/cool air side one, they are two different reducer sizes, which I can't remember at the moment.
Universal Red Silicone Straight Reducing Joiner Hose SELECT SIZE (Black Core) | eBay
Find many great new & used options and get the best deals for Universal Red Silicone Straight Reducing Joiner Hose SELECT SIZE (Black Core) at the best online prices at eBay! Free delivery for many products.
www.ebay.co.uk
Red Silicone Hose Straight Reducer - Coolant Rad Engine Pipe Tube Reduction Step | eBay
SSR 012 008 Straight Reducer 12mm - 8mm 1/2" > 5/16" 21mm - 17mm 18mm-25mm +13mm-20mm 127mm 4.5mm 3 8.33 25.00. SSR 016 013 Straight Reducer. SSR 019 013 Straight Reducer 19mm - 13mm 3/4” > 1/2” 27mm - 22mm 22mm-30mm +22mm-30mm 127mm 4.5mm 3 6.50 19.50.
www.ebay.co.uk
Last edited:
If you used the heater studs to join onto it would have been M6. Easiest to remove the heater studs and replace with longer M6 studs. They come out of the heater easily.
Yeah, I cant remember if I used them a size larger and put the M6 bolt through them as a spacer, or used M6 nuts and threaded them onto the bolts as I went, I used stainless Allen head bolts for corrosion resistance.
It also made clamping the inlet tubing and exhaust tubing a problem, I had to do that first then mount the heater to the cradle, not enough gap to get in once it was fitted. (or at least not enough space to get the clamps in once the heater was mounted to the cradle, )

It also made clamping the inlet tubing and exhaust tubing a problem, I had to do that first then mount the heater to the cradle, not enough gap to get in once it was fitted. (or at least not enough space to get the clamps in once the heater was mounted to the cradle, )
Last edited:
Similar threads
- Replies
- 5
- Views
- 383
- Replies
- 45
- Views
- 4K
- Replies
- 1
- Views
- 913
- Replies
- 4
- Views
- 1K