My Silver T6 LWB build thread.

Outcycling

Member
T6 Pro
Hi all,

Thought Id start a thread for our T6 that we are converting. Hopefully something shown could help someone and contribute back to the community.

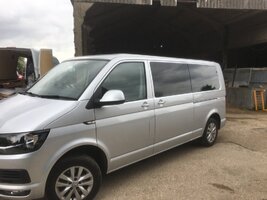
Got this last year second hand 2019 T6 LWB with tailgate.
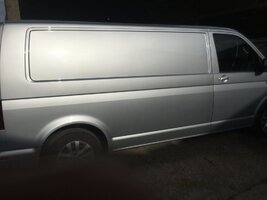
IMG_1086.jpgIMG_1087.jpg

So far Id installed a westfalia swan neck towbar & planar external diesel heater (which I plumbed into the fuel tank). Id also put in some sound deadener 2mm silent coat & various insulation all from deadening.co.uk.

A few months ago we got SK Conversions to install a Hilo sport 2.0 pop top roof. Super impressed with how low profile it is. will add a photo of it when I finally take one.

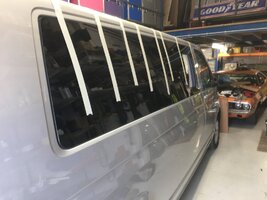
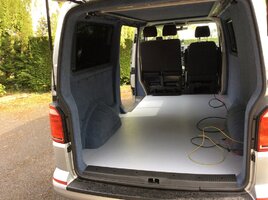
Last week I got busy and a mate let me use his workshop so I could install windows, the ply floor, carpet the walls, lay a altro floor, put in a MS Craft swivel passenger seat base, install the starter battery cable through to the DC DC location and wire in a cable for the DC DC to recognise ignition activation. The windows we got from camper glass and impressed with the quality and fit overall.

Used plastic sheet and masked everything up. Then cut out the reinforcement bars in the panels, drilled a whole in the corner and then cut them out. My friend has an air nibbler which was great although it does spit little bits of metal everywhere. A hoover, bag or something to catch them as you go would have been good. I cut them out in 2 passes. Not sure if totally neccessary but some sites say to release tension in the panel by cutting out smaller area first so thats what I did.

IMG_1088.jpgIMG_1089.jpgIMG_1090.jpg

Once cut out I filed & treated the edges with some of the primer from the windows pack and on the panels outside for the adhesive. Shold have masked up where I wanted the primer to go as id have got a straighter line not that it matters really as you dont see it.
IMG_1093.jpg

Then went on the window trims.

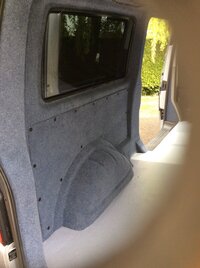
I carpeted the inside with 4 way stretch pacific blue from mega van matts. On the whole the carpet install was very easy and went in very smoothly with a professional finish.

I used up the some of the excess insulation on the floor. Not sure how much benefit it is but cant do any harm and probably adds some sound deadening.

IMG_1096.jpg

Then went in the one piece ply floor what I also got from SK Conversions. I stuck this down with Tiger seal and lots of weights over the entire floor.
IMG_1099.jpg

Next was the big one with all the windows going in. This was suprisingly easy. I cut of the nozzel to the middle setting including a peeked notch and my mate had a electric gun which made running a smooth bead pretty effortless. The adhesive held up remarkably well with minimal sag. Masking taped it all up and left overnight. The only window we had trouble with was the tailgate as the window wouldnt sit down properly with the trim in place so we installed it without the trim and ill need to sort something out at a later date to neaten it up.
IMG_1097.jpgIMG_1098.jpg

I then laid the altro flooring down which was painful as always but I got a good finish. I laid it long so that the front edge went under the rear of the front cab rubber floor and the rear long to go under the black tailgate plastic floor edge cover. The altro floor is super tough and seems to have little bits of stone in it or something. Really went through stanley blades. The hooked blades are really helpfull for the install and just go super slowly taking a little at a time.

We wired in the side step light to the roof light connector next. I took the wire under the step & floor then up under the seatbelt trims.

Because I needed to install a sensor wire for the DC DC charger to recognise ignition on I had to take all the dash apart. I found a great instructional video for this that made the process easy. Look on youtube for "How to retrofit VW Transporter T6 Comfort Dash" by Advanced In-Car Technologies. I soldered the sensor wire in to the wire going to the fuse 5th down on the right which only seems to come on with the ignition.

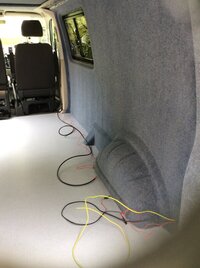
The battery cable and towbar wires I took through a gromet on the front nearside of the engine bay behind the battery compartment. You have to remove the wipers & scuttle tray (this just pulls up) I drilled a hole through the black metal panel behind the battery and then took the cables through the grommet and down into the floor passenger side. The battery cable was 5.5m long and went straight through the middle of the chairs by the handbrake then behind the driver chair to the corner and then ontop of the floor to the rear. It'll eventually get clipped up and hidden behind the units. The towbar wires I had to take across under the dash to the 2 big cable port connectors on the drivers side and solder them onto the apropriate wires. This was a sod as the room/access was minimal but just about doable. I did find 2 of the cables I needed to connect to in the big pile of wires in the centre of the floor which would have been a lot easier to connect to but couldnt find the last one so had to do as per the instructions. Just need someone to come and toggle my towbar flag now so it all works correctly.


IMG_1107.jpgIMG_1108.jpgIMG_1109.jpg


Here it is so far.
IMG_1100.jpg

IMG_1765.jpgIMG_1766.jpgIMG_1767.jpg

I am now working on the units design & collecting parts to make/install them. I am using sketchup to design it all.

IMG_1764.jpg
 
Hi all,

Thought Id start a thread for our T6 that we are converting. Hopefully something shown could help someone and contribute back to the community.

Got this last year second hand 2019 T6 LWB with tailgate.
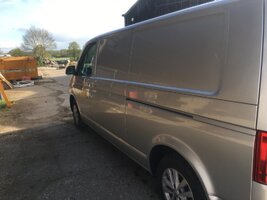
View attachment 116670View attachment 116671

So far Id installed a westfalia swan neck towbar & planar external diesel heater (which I plumbed into the fuel tank). Id also put in some sound deadener 2mm silent coat & various insulation all from deadening.co.uk.

A few months ago we got SK Conversions to install a Hilo sport 2.0 pop top roof. Super impressed with how low profile it is. will add a photo of it when I finally take one.

Last week I got busy and a mate let me use his workshop so I could install windows, the ply floor, carpet the walls, lay a altro floor, put in a MS Craft swivel passenger seat base, install the starter battery cable through to the DC DC location and wire in a cable for the DC DC to recognise ignition activation. The windows we got from camper glass and impressed with the quality and fit overall.

Used plastic sheet and masked everything up. Then cut out the reinforcement bars in the panels, drilled a whole in the corner and then cut them out. My friend has an air nibbler which was great although it does spit little bits of metal everywhere. A hoover, bag or something to catch them as you go would have been good. I cut them out in 2 passes. Not sure if totally neccessary but some sites say to release tension in the panel by cutting out smaller area first so thats what I did.
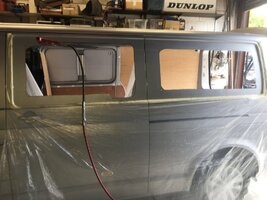
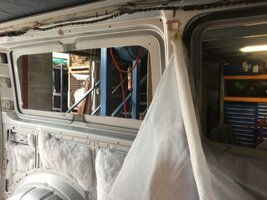
View attachment 116672View attachment 116673View attachment 116674

Once cut out I filed & treated the edges with some of the primer from the windows pack and on the panels outside for the adhesive. Shold have masked up where I wanted the primer to go as id have got a straighter line not that it matters really as you dont see it.
View attachment 116677

Then went on the window trims.

I carpeted the inside with 4 way stretch pacific blue from mega van matts. On the whole the carpet install was very easy and went in very smoothly with a professional finish.

I used up the some of the excess insulation on the floor. Not sure how much benefit it is but cant do any harm and probably adds some sound deadening.

View attachment 116678

Then went in the one piece ply floor what I also got from SK Conversions. I stuck this down with Tiger seal and lots of weights over the entire floor.
View attachment 116679

Next was the big one with all the windows going in. This was suprisingly easy. I cut of the nozzel to the middle setting including a peeked notch and my mate had a electric gun which made running a smooth bead pretty effortless. The adhesive held up remarkably well with minimal sag. Masking taped it all up and left overnight. The only window we had trouble with was the tailgate as the window wouldnt sit down properly with the trim in place so we installed it without the trim and ill need to sort something out at a later date to neaten it up.
View attachment 116680View attachment 116681

I then laid the altro flooring down which was painful as always but I got a good finish. I laid it long so that the front edge went under the rear of the front cab rubber floor and the rear long to go under the black tailgate plastic floor edge cover. The altro floor is super tough and seems to have little bits of stone in it or something. Really went through stanley blades. The hooked blades are really helpfull for the install and just go super slowly taking a little at a time.

We wired in the side step light to the roof light connector next. I took the wire under the step & floor then up under the seatbelt trims.

Because I needed to install a sensor wire for the DC DC charger to recognise ignition on I had to take all the dash apart. I found a great instructional video for this that made the process easy. Look on youtube for "How to retrofit VW Transporter T6 Comfort Dash" by Advanced In-Car Technologies. I soldered the sensor wire in to the wire going to the fuse 5th down on the right which only seems to come on with the ignition.

The battery cable and towbar wires I took through a gromet on the front nearside of the engine bay behind the battery compartment. You have to remove the wipers & scuttle tray (this just pulls up) I drilled a hole through the black metal panel behind the battery and then took the cables through the grommet and down into the floor passenger side. The battery cable was 5.5m long and went straight through the middle of the chairs by the handbrake then behind the driver chair to the corner and then ontop of the floor to the rear. It'll eventually get clipped up and hidden behind the units. The towbar wires I had to take across under the dash to the 2 big cable port connectors on the drivers side and solder them onto the apropriate wires. This was a sod as the room/access was minimal but just about doable. I did find 2 of the cables I needed to connect to in the big pile of wires in the centre of the floor which would have been a lot easier to connect to but couldnt find the last one so had to do as per the instructions. Just need someone to come and toggle my towbar flag now so it all works correctly.


View attachment 116686View attachment 116687View attachment 116688


Here it is so far.
View attachment 116689

View attachment 116683View attachment 116684View attachment 116685

I am now working on the units design & collecting parts to make/install them. I am using sketchup to design it all.

View attachment 116682
Amazing and now very jealous, I've a 16 plate T6 LWB with tailgate in silver and a finger that I need to pull out. Great write up. Are you anywhere near Bolton?
 
You have done a great job there. Carpet lining looks very professional!
 
Thanks guys for the comments. No where near Bolton I’m afraid, down in Surrey. Just ordered the ply from Morlands. Gloss white for the units and black with silver speckles for the top. Got a Santo 450 fridge sitting in the spare room and obligatory spec 9222 sink/hob unit on order :). Got a little break from it now as wont get the ply for a few weeks as the boss is going to collect it on her way up to visit family.
 
Thanks guys for the comments. No where near Bolton I’m afraid, down in Surrey. Just ordered the ply from Morlands. Gloss white for the units and black with silver speckles for the top. Got a Santo 450 fridge sitting in the spare room and obligatory spec 9222 sink/hob unit on order :). Got a little break from it now as wont get the ply for a few weeks as the boss is going to collect it on her way up to visit family.
Very nice van!
 
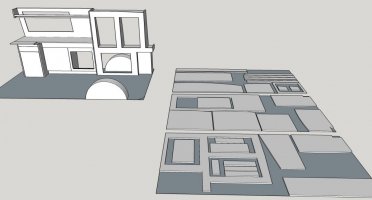
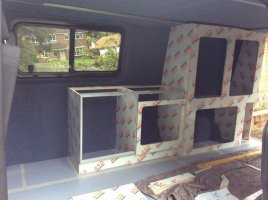
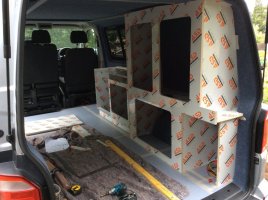
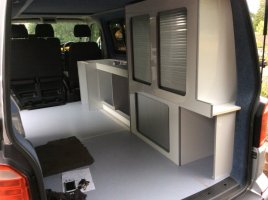
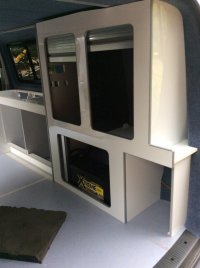
So now started on the units. Designed using sketchup and copious amounts of looking at other units.

VW T6 Van Layout 1.jpg

The sketchup also has the van sides/roof etc but turned those off so you can see units. Also layed out on 3 sheets all the pieces to plan cutouts.

I had got 3 sheets of gloss white for units and 1 of black speckled for worktop lightweight ply from Moorlands. We collected but turned out one of the sheets was faulty but we didnt notice until we got home which was a right pain but they just sent out a replacement and collected the faulty one free of charge so np. The sheets at the time cost around £150 a sheet which I thought was ridiculous but I can see now they are around £200 which is ludicrous and think I might have gone with something else if theyd been that much.
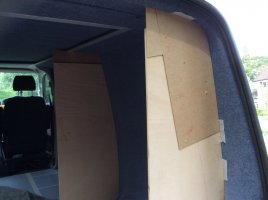
I happen to have a mate with a full sized cnc machine so he cut them all out for me with everything just being cut to rectangles so I can scribe them into the van. Despite all the planning I still managed to get a number of pieces the wrong size, missed some and didnt actually need others like the roof of the wardrobe unit.

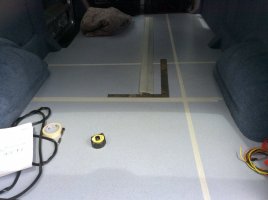
To start I put down a parallel line on the van to be the face of the units. I did this by finding a spot in the middle of the wheel arches and then squaring up a line from there.
IMG_1814.jpg

I am fitting a Smart-bed Evo with rails and for that I need to leave 990mm from the nearside wheel arch so set my squared line 1m away to play safe (I hope!).

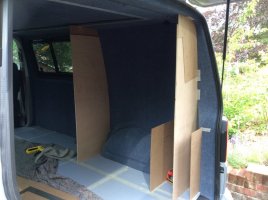
To scribe to the van I made templates with some cheap spare ply and hardboard I had lying about. Get one large bit smaller than the area you need then get a load of small bits of hardboard and attache them to the large piece pushed into the side of the van to form the shape. This was by far the easiest way to do it. I dont actually have a photo of that method as I started off literally scribing to the van which was a right sod for the rear full height board hence then moved to the other method.

IMG_1822.jpgIMG_1823.jpg

For scribing the finished boards I just used my templates, marked on the finish boards and then cut them out with a Festool saw/guide and a jigsaw. I had very little breakout giving a good finish. Just use new blades on the jigsaw and go slow with the jigsaw on minimum setting.

I set all my internal curves to 30mm radius so the silver push in trim would form OK. I've got a few external 90s which are not ideal as the trim really doesnt form well to those & I should have given them all at least some radius. You can get them to fit reasonably close by cutting out a V from the rear push in section of the trim and even heading the trim a little if needs be but best to avoid that Id say if you can.IMG_1843.jpgIMG_1844.jpgIMG_1845.jpgIMG_1846.jpgIMG_1847.jpg

There is no need for a roof in the wardrobe cos you cant see in and the roller blinds cover up most of the hole. Also because I have a poptop there is a rear tie down bolt going through the rear roof of the van which is in the wardrobe so no roof gives me easy access.

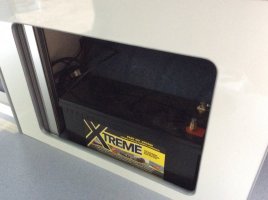
My mate made me a metal tray to put the battery in which was bolted down through the floor.
 
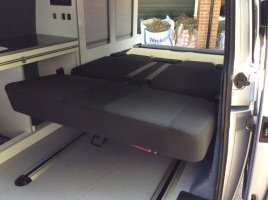
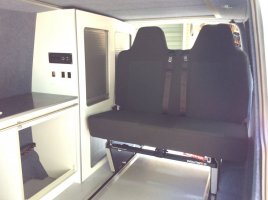
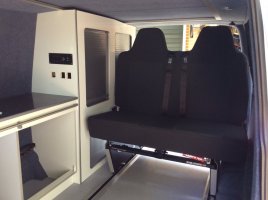
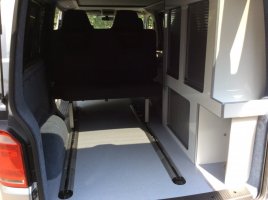
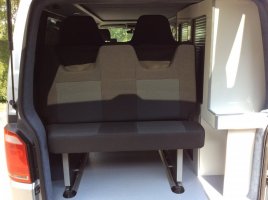
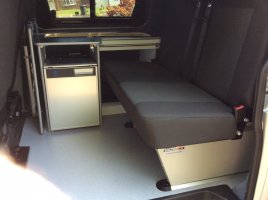
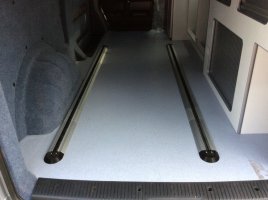
Finished installing the RnR smart-bed with rails.

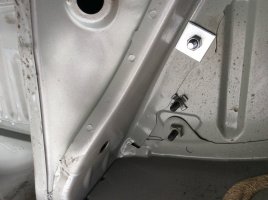
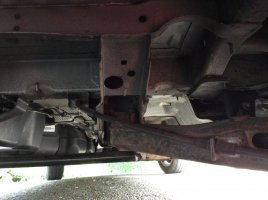
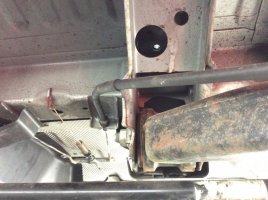
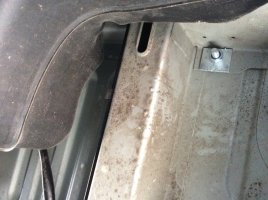
To start (on a T6, your mileage may vary) you need to look under the rear quarter near side and you’ll see 2 bolts. Just in front of them and to one side you’ll see a round recess in the underside and this is your first reference point to start and needed to drill a 10mm hole up through the floor. This pick shows it with the new shiny bolt already installed.
8B2AA840-1985-4A4A-BE51-225943A5B0A8.jpeg
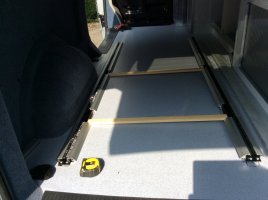
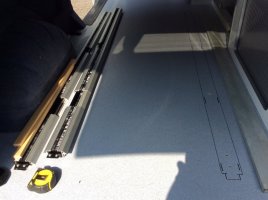
Now I had to line up the rail on that hole and on the side of the van wheel arch and drill down through all the other holes in the rail except the second one. What I actually did was,when you look under the van it’s obvious where the bolt goes at the other end of the vehicle as there is another round recess just in front of the fuel tank. I managed to drill a hole up from the underside which although on an angle (because of fuel tank) was in alignment with the rail. I could then make sure the rail was aligned that end before drilling down from above. With the rail in place I used a permanent marker and marked the channel under the rail and eventually cut it all out. First Altro floor with Stanley blade then the ply floor with a Fein Multimaster & half round blade knocking it out with a chisel. My floor was stuck down so no screws to worry about. To locate the second rail I cut 2 bits of wood 706mm long and butted them up to the channels as shown making sure that the end of the rails lined up using a large roofers square. The drill down through the holes as before and cut out.
E474A951-FBBB-4A38-9F6B-E572A7CF8D88.jpeg
82B9809D-4ABF-4A47-8810-B66B03AEC09C.jpeg
Then got a minion to turn the bolts from above while I crawled under the van and held the nuts with a spanner. One of the nuts is in a really awkward location. Haven’t actually fitted that one yet as I was short a bolt, but not having a 3 year old to get his hand into the recess, apparently I’ll need to stick the bolt to the washer and tape it to a long spanner to get it in location while someone turns bolt from above. Bolt location.
438E9DD4-17FA-4CAB-962E-54A8DBE1C663.jpeg5C6D270C-4DEF-4207-807C-3993FB978E48.jpeg
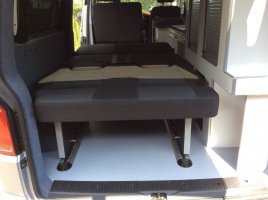
It was just then a case of drafting in some muscle to help me lift the bed/char into the slots. It fitted like a glove all around thank goodness :). Looks great. It seems quite high though so not really suitable I’d say for anyone tall to sit on.
82690317-8D46-4845-A5B8-9C9F95CDF091.jpegDA12EBF1-D335-44DB-B768-6ABA437BC856.jpeg51DF788F-1697-41AB-8D4D-1631B6254B2C.jpegBF9657EC-230C-40A9-B179-9BDD16708F47.jpeg96E7CB2E-16E8-4F1F-8F43-D3E26DBEFD18.jpeg26D0DB19-E9F6-4D91-A68F-85D41E50D900.jpegA7FF932B-D0DC-45B6-82D9-44D1FA8F3F3F.jpeg

15D33A31-EDCC-4719-AA7F-8ADC8C2B23E1.jpeg

18AC69C6-845F-4ED6-B4D2-44F7C4B8493E.jpeg
 
Hi all,

Thought Id start a thread for our T6 that we are converting. Hopefully something shown could help someone and contribute back to the community.

Got this last year second hand 2019 T6 LWB with tailgate.

View attachment 116670View attachment 116671

So far Id installed a westfalia swan neck towbar & planar external diesel heater (which I plumbed into the fuel tank). Id also put in some sound deadener 2mm silent coat & various insulation all from deadening.co.uk.

A few months ago we got SK Conversions to install a Hilo sport 2.0 pop top roof. Super impressed with how low profile it is. will add a photo of it when I finally take one.

Last week I got busy and a mate let me use his workshop so I could install windows, the ply floor, carpet the walls, lay a altro floor, put in a MS Craft swivel passenger seat base, install the starter battery cable through to the DC DC location and wire in a cable for the DC DC to recognise ignition activation. The windows we got from camper glass and impressed with the quality and fit overall.

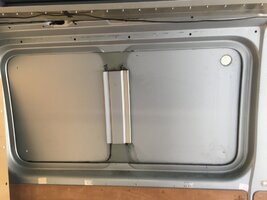
Used plastic sheet and masked everything up. Then cut out the reinforcement bars in the panels, drilled a whole in the corner and then cut them out. My friend has an air nibbler which was great although it does spit little bits of metal everywhere. A hoover, bag or something to catch them as you go would have been good. I cut them out in 2 passes. Not sure if totally neccessary but some sites say to release tension in the panel by cutting out smaller area first so thats what I did.
View attachment 116672View attachment 116673View attachment 116674

Once cut out I filed & treated the edges with some of the primer from the windows pack and on the panels outside for the adhesive. Shold have masked up where I wanted the primer to go as id have got a straighter line not that it matters really as you dont see it.
View attachment 116677

Then went on the window trims.

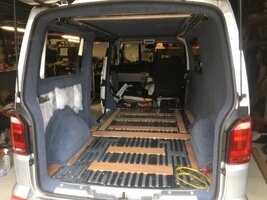
I carpeted the inside with 4 way stretch pacific blue from mega van matts. On the whole the carpet install was very easy and went in very smoothly with a professional finish.

I used up the some of the excess insulation on the floor. Not sure how much benefit it is but cant do any harm and probably adds some sound deadening.
View attachment 116678

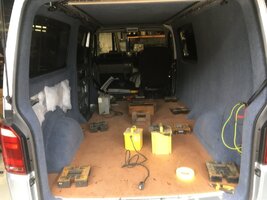
Then went in the one piece ply floor what I also got from SK Conversions. I stuck this down with Tiger seal and lots of weights over the entire floor.
View attachment 116679

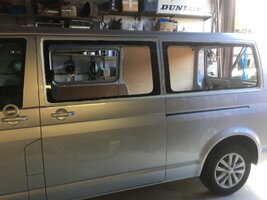
Next was the big one with all the windows going in. This was suprisingly easy. I cut of the nozzel to the middle setting including a peeked notch and my mate had a electric gun which made running a smooth bead pretty effortless. The adhesive held up remarkably well with minimal sag. Masking taped it all up and left overnight. The only window we had trouble with was the tailgate as the window wouldnt sit down properly with the trim in place so we installed it without the trim and ill need to sort something out at a later date to neaten it up.
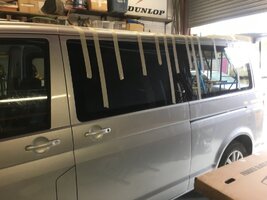
View attachment 116680View attachment 116681

I then laid the altro flooring down which was painful as always but I got a good finish. I laid it long so that the front edge went under the rear of the front cab rubber floor and the rear long to go under the black tailgate plastic floor edge cover. The altro floor is super tough and seems to have little bits of stone in it or something. Really went through stanley blades. The hooked blades are really helpfull for the install and just go super slowly taking a little at a time.

We wired in the side step light to the roof light connector next. I took the wire under the step & floor then up under the seatbelt trims.

Because I needed to install a sensor wire for the DC DC charger to recognise ignition on I had to take all the dash apart. I found a great instructional video for this that made the process easy. Look on youtube for "How to retrofit VW Transporter T6 Comfort Dash" by Advanced In-Car Technologies. I soldered the sensor wire in to the wire going to the fuse 5th down on the right which only seems to come on with the ignition.

The battery cable and towbar wires I took through a gromet on the front nearside of the engine bay behind the battery compartment. You have to remove the wipers & scuttle tray (this just pulls up) I drilled a hole through the black metal panel behind the battery and then took the cables through the grommet and down into the floor passenger side. The battery cable was 5.5m long and went straight through the middle of the chairs by the handbrake then behind the driver chair to the corner and then ontop of the floor to the rear. It'll eventually get clipped up and hidden behind the units. The towbar wires I had to take across under the dash to the 2 big cable port connectors on the drivers side and solder them onto the apropriate wires. This was a sod as the room/access was minimal but just about doable. I did find 2 of the cables I needed to connect to in the big pile of wires in the centre of the floor which would have been a lot easier to connect to but couldnt find the last one so had to do as per the instructions. Just need someone to come and toggle my towbar flag now so it all works correctly.
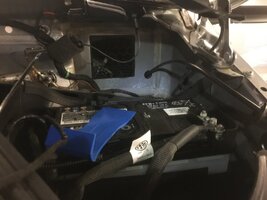

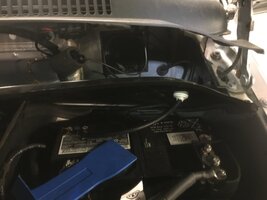
View attachment 116686View attachment 116687View attachment 116688


Here it is so far.
View attachment 116689

View attachment 116683View attachment 116684View attachment 116685

I am now working on the units design & collecting parts to make/install them. I am using sketchup to design it all.
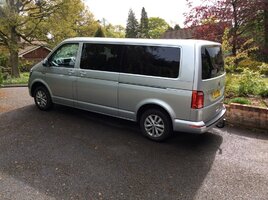
View attachment 116682
Looking good nice job, wish I'd have gone for the one piece ply looking back.
 
Back
Top