How've You Installed Your Solar Panel?

Wills

Senior Member
VIP Member
T6 Legend
I'm looking for the best practice to install a semi flexi panel on a pop top. Any pics would be useful too please.
Mine has the cabling on the upside of the panel so will need a dual entry gland set up.

Where the most sensible position for the panel?
Should the gland housing be installed with the cable entry facing backwards to reduce possible water ingress?
How to tie the cables down to the roof so they're neat and safe from snagging any overhead contact?
Best cable route and entry path into the van?
 
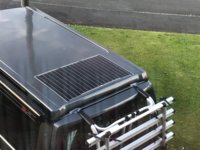
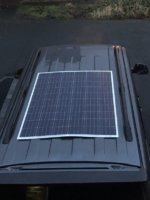
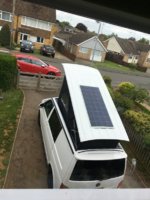
My flexible panel is installed towards the rear of the pop-top but if you have a rear lifting roof it would make sense to put it at the front (i.e. lowest point of the raised roof to simplify cabling).

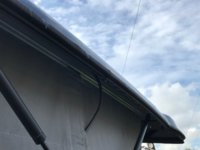
The cable exit on mine is underneath at the rear so the only hole drilled through the roof is below the panel and well outside of the tented area, thus, even if the gland is not perfectly installed and you end up with a bit of a leak (haven't noticed any from mine so far) there will be no damage to the roof/van.

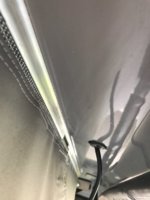
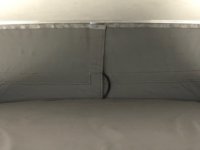
My cable just has a small unsecured loop in the cable that naturally bends when the roof is lowered/raised and it brought into the van via the velcro strip in the back of my roof (SCA 194).

Hope this helps.
 
On my previous van I had cables from the top of the panel into a dual entry gland. They faced the direction travel, never had an issue with water coming in. Cables were relatively taught and the glands were fairly close to the panel. There was no slack in the wires that could get caught.

This time I’ve gone for a panel with the connections on the underside. There is a slight bulge in the panel where the cable box is underneath but it’s much neater. The panel then covers where the wires enter the roof.

I’ve also seen panels where the cables exit the top of the panel and are then tucked underneath the panel (in the gap created by the ribs on the roof) then the panel stuck over the top covering where the cables enter the van.
F73A6611-8E1F-4489-87CA-21790364300E.jpeg
 
On a pop top I would use a panel with a rear jct box and cut this into the space between the rear edge of the roof and the cloth interior. If you have wing doors you can bring the cables in through the tailgate hinge blanking grommets.
 
It's a 100w PV Logic Flexi from Solar Technology International:- 100 Watt Panel Kit - Black
Thanks, don't suppose you have a photo of how the connection cable comes through the roof as this would be helpful?
The panel looks great (I beleive this is the one Jerba fit to their Campervans too) though it does seem expensive compared to others I've looked at.
 
Thanks, don't suppose you have a photo of how the connection cable comes through the roof as this would be helpful?
The panel looks great (I beleive this is the one Jerba fit to their Campervans too) though it does seem expensive compared to others I've looked at.
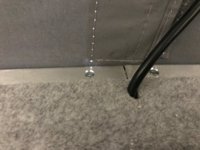
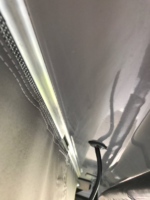
The panel has it's cable entry on the underside and just has a hole drilled through the roof with a grommet on the underside - the position of the cable means it's outside of the tented area and is then taken back into the van via the velcro fastening at the rear of my SCA. The loop of cable required to cope with poptop raising and lowering is managed via the velcro with no cable ties, etc., required - simple but effective :-

IMG_3360.jpg
IMG_3362.jpg
IMG_3364.jpg
IMG_3365.jpg

image.png

image.png
 
hello all, would be very interested to know your setups inside with regards to Solar... ie the controller - where your batteries are - cable runs etc.

we have a setup already and im thinking to add solar. my 2nd battery is under our LHD driver seat.

any advice/tips etc would be v welcome!

I can get things from @travelvolts sent over to Switzerland (not sure on the panels tho..might be too pricey!)
 
We had some unusually hot weather in the UK during July and my solar kept working without issue.

Whilst the panel is bonded to the roof, it is only bonded along 3 edges which means there is a very small air pocket below the cells - this, together with the built it aluminium heat synch, seems avoid the potential problems of over heating.
 
ok interesting. i was also thinking if the panel fails then i can more easily replace it..

just got to source some rails for the SCA 198...?!
 
silly question @Davenjo - how did you manage to have just one cable to come through the SCA? very neat. Did you put the two together or was your panels output already the + and - gained together?

im looking to get the one deaky has, and it means two holes, two cable to control - unless i merge them together i guess..?
 
Back
Top