CRD

Senior Member
T6 Guru
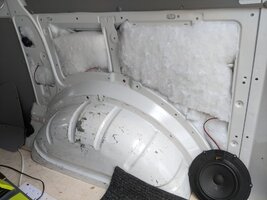
I have fitted rear speakers and have run the cables through under the cab floor and they are currently dangling through fuse box access panel at the moment. I shall (hopefully) get them connected tomorrow but first I'll need to remove the head unit (Discover sat-nav).
Any pointers or tips on how to do this would be appreciated :thumbsup:
 
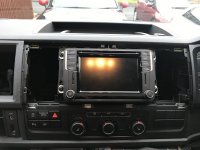
You need to remove the trim surrounding the radio, the whole thing including the vents pops of complete
It's quite tight to get it going, there are four clips top and four clips on the bottom I find the best method is to start from bottom on one side and using a trim removal tool work your way along popping them then move to top.
Once off there are four torx/star drive screws holding the radio in place
I would recommend against using a screwdriver or similar tool to work on fascia as it's extremely difficult to remove it without leaving marks using something metallic
 
  • Like
Reactions: CRD
You need to remove the trim surrounding the radio, the whole thing including the vents pops of complete
It's quite tight to get it going, there are four clips top and four clips on the bottom I find the best method is to start from bottom on one side and using a trim removal tool work your way along popping them then move to top.
Once off there are four torx/star drive screws holding the radio in place
I would recommend against using a screwdriver or similar tool to work on fascia as it's extremely difficult to remove it without leaving marks using something metallic
Brilliant, thanks for that Pauly. A trip to Halfords beckons tomorrow for a trim removal tool then :thumbsup:
 
I prefer the one with a curved end, looks like a miniature crow bar
 
  • Like
Reactions: HHO
Thanks for assistance @Pauly and @RattyMcClelland. Well, got it off eventually using an old b+q trade card to work all the way around the vent panel. Was tight but with some persistence finally succumbed!

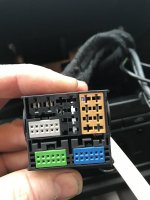
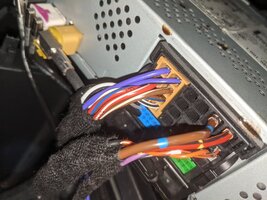
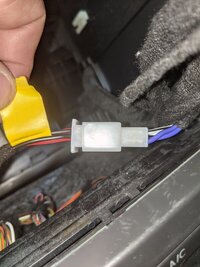
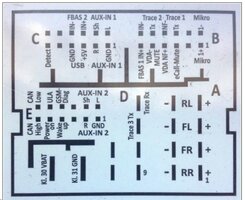
Now my next question is, what outputs on the speaker plug relate to the right and left channel from the head unit? I.e, brown 1 and 5 would be which side?

IMG_0051.JPG IMG_0052.JPG IMG_0055.JPG
 
Last edited:
Ps. Slide the purple pin out of the black Quadlock. This will allow you to remove the individual yellow connection block.
 
  • Like
Reactions: CRD
This forum is so awesome! Although I did use Google to find this thread ;-)

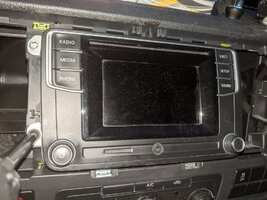
As above, lever the surround including vents, starting at the bottom left near the hazard button, popping four clips along the bottom and then work round the lefthand side to the top, where four more clips need popping.

Lift out the whole surround with vents to reveal the head unit torx screws. Undo them and pull out the head unit.:
PXL_20210518_202810835.jpg
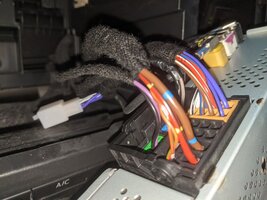
Lift up the black lever from the bottom of the multi-connector block:
PXL_20210518_201136209.jpg
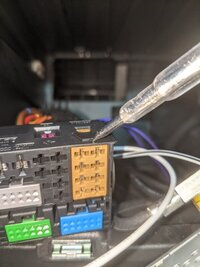
Gently lever up the clips bottom right and on top of the brown connector and it slides out the back of the black frame:
PXL_20210518_200022403.jpg
Push the purple pin out from the bottom of the block:
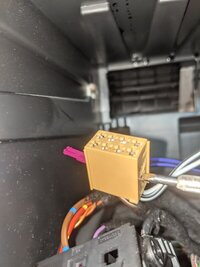
PXL_20210518_200120404.jpg

Fit your new iso pins into the spare pairs top and bottom of the brown connector - they are a pair of + / - at the top and same at the bottom, one right channel, one left (see diagram above)
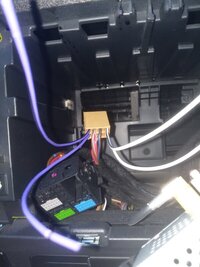
16213672761213699567413609104526.jpg
No chance of the purple pin going back in on mine as the cables are too wide on this Halford's ISO set I used (£4)
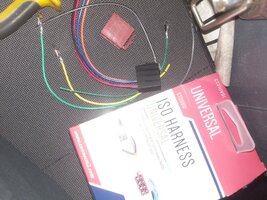
16213675836315727696595954870799.jpg
But they all clicked into place and there's no chance of them coming out. I used some TESA tape to add my cables to the bundle going out below the head unit.

Reverse the steps to refit
 
Last edited:
I couldn't see a pin number on the brown block so can someone tell me which of my purple (top) or white (bottom) pair will be left and right, when looking at the back of the head unit:
PXL_20210519_224957635.jpg
I simply flagged one pair with insulating tape as I ran it through from the rear of the van, but I haven't cut the cable to length so I need to known which is which:
PXL_20210519_224949558.jpg
If it's wrong I can simply re-patch my connector but I'd prefer not to open the dash again
 
Continuing the guide, theme... here's a simple reuse of the front speakers in the rear.

Proper install ideas are here: Thread 'Show us your rear speakers!' https://www.t6forum.com/threads/show-us-your-rear-speakers.23044/PXL_20210520_072432240.jpg
PXL_20210519_201125900.jpg

PXL_20210520_114203310.jpg
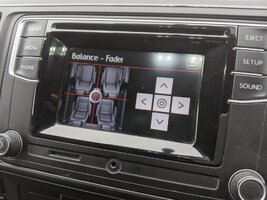
The head unit drives the speakers immediately but no ability to fade front to back.
PXL_20210520_111338926.MP.jpg
You need to enable the rear speakers in the ECU.

Long discussion here: Thread 'Can rear speakers be added to the standard head unit with front/ rear fader?' https://www.t6forum.com/threads/can...andard-head-unit-with-front-rear-fader.26559/

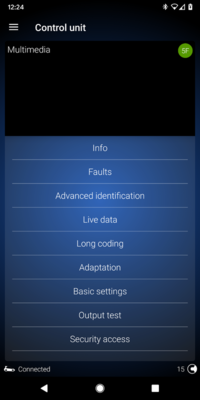
On my OBDeleven it's in the Multimedia module (5F on other systems)
Screenshot_20210520-122438.png
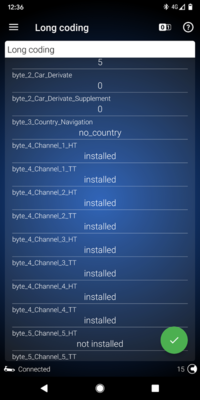
And you enable two items on byte 4 channel 1 and two items on byte 4 channel 4: - there should be eight ticks in all.
Screenshot_20210520-123635.png
Then, after committing the change, you need to reboot the head unit by holding in the power button until it reboots (15 secs+) and the VW screen appears.
PXL_20210520_113645969.jpg
Bingo!
 
Apologies re-instating this old thread but in my research for adding rear speakers I came across it.
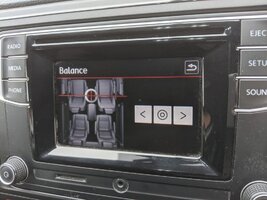
Anyway, I have a 2016 Highline kombi with the following factory head unit:
20220106_160452.jpg
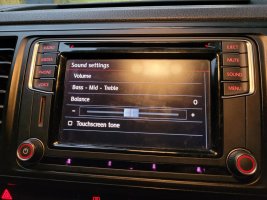
Is it possible to add rear speakers and to get the fader working, as illustrated it currently only shows balance between left and right speakers, no image of the whole vehicle like the previous photo? Thought I'd ask before pulling the trim apart to check that brown block connector.
 
Apologies re-instating this old thread but in my research for adding rear speakers I came across it.
Anyway, I have a 2016 Highline kombi with the following factory head unit:
View attachment 140853
Is it possible to add rear speakers and to get the fader working, as illustrated it currently only shows balance between left and right speakers, no image of the whole vehicle like the previous photo? Thought I'd ask before pulling the trim apart to check that brown block connector.
Has to be coded - there’s info on here how it’s done
 
Back
Top