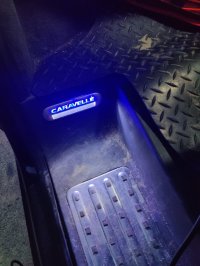
This may well have been done before, so apologies, but thought I'd show how I eventually fitted LEDs in my step lights...it's pretty simple but I tried to do it in a way that I'll be able to finally forget about it without any worries, so thought I'd share 
Originally I bought a full interior LED kit off AliExpress. Everything was perfect......except the ones for the step lights. It might have been just a bad kit, but the replacement LEDs seemed to give a patchy output, and if they weren't in the perfect position they either didn't work or blew the fuse. And if they were in the perfect position, they'd rattle loose and either not work or blow the fuse. So they were left unplugged for around a year...
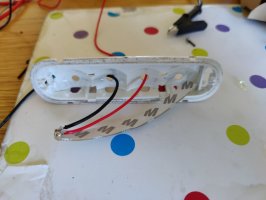
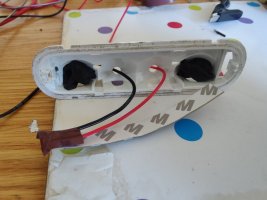
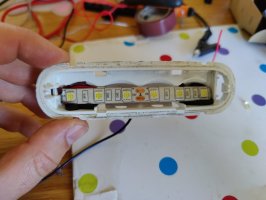
Basically, I opened the unit, pulled the bulbs out, cut a piece of LED strip to size and soldered two wires to it, then stuck the LED strip in with butyl mastic (only because I've got lots and its sticky - anything sticky will do) and ran the wires through. Pulled the brass strips out of the bulb holder bit at the back so they couldn't short together any more, and after enlarging the holes, soldered the two wires to the brass contacts. Covered all the exposed bits up with tape (ended up better than stock), tested, plugged in, and then did the other three. I was worried they might not like the fade in/out but they seem to respond to change in voltage without too much flicker.


Couple of videos showing the back bit in more detail, and what happens when you vary the volts...
Originally I bought a full interior LED kit off AliExpress. Everything was perfect......except the ones for the step lights. It might have been just a bad kit, but the replacement LEDs seemed to give a patchy output, and if they weren't in the perfect position they either didn't work or blew the fuse. And if they were in the perfect position, they'd rattle loose and either not work or blow the fuse. So they were left unplugged for around a year...
Basically, I opened the unit, pulled the bulbs out, cut a piece of LED strip to size and soldered two wires to it, then stuck the LED strip in with butyl mastic (only because I've got lots and its sticky - anything sticky will do) and ran the wires through. Pulled the brass strips out of the bulb holder bit at the back so they couldn't short together any more, and after enlarging the holes, soldered the two wires to the brass contacts. Covered all the exposed bits up with tape (ended up better than stock), tested, plugged in, and then did the other three. I was worried they might not like the fade in/out but they seem to respond to change in voltage without too much flicker.


Couple of videos showing the back bit in more detail, and what happens when you vary the volts...

