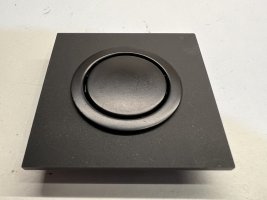
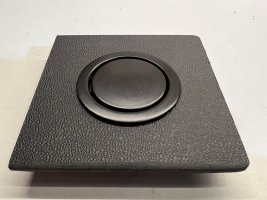
did you buy one?
You are using an out of date browser. It may not display this or other websites correctly.
You should upgrade or use an alternative browser.
You should upgrade or use an alternative browser.
Dashboard centre storage hole
- Thread starter Kev Lount
- Start date
haha i had a feeling you would say thatno, I’m waiting for you
I too saw this at Busfest, and agree the quality was lacking - perhaps they didn't do themselves any favour having it displayed on a table, you could critique all angles, which you wouldn't otherwise see once installed in the vanThey had them on sale in Van X stall at Busfest. I must admit they look a bit flimsy and a poor fit.
Plastic hinge and sheet bought on ebay. I made it with hand tools, not entirely straight forward as there is no square edge to use as a reference.
I’m an apprentice trained fitter & turner so I have plenty of hand crafting experience with this sort of thing. It’s a bonus if your vice is close to the van, mine wasn’t!
Give it a go, the materials are cheap and if you balls it up its a learning curve, start again.
You will need to remove some material on the existing trim strip to create a straight edge for the hinge attachment, this has to be done before making the cover.
I’m going to have a crack at this.
I have a couple of samples, the Matt Black @DXX has used and linked us to (thanks), and a textured black closer to the markings of the dashboard itself.
Any thoughts, which is your favourite?
I’m undecided but leaning towards textured. The Matt is closer to the removable trim piece and also the Van X glovebox.
My plan is to template it using 3mm cardboard, then redraw it in the computer to be laser cut.
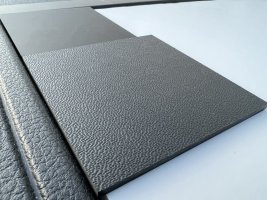
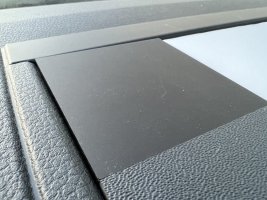
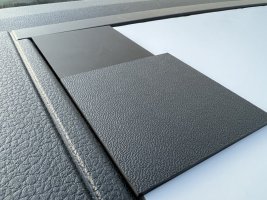
IMO you will have a rippled edge and it will stand out with the textured surface.I’m going to have a crack at this.
I have a couple of samples, the Matt Black @DXX has used and linked us to (thanks), and a textured black closer to the markings of the dashboard itself.
Any thoughts, which is your favourite?
I’m undecided but leaning towards textured. The Matt is closer to the removable trim piece and also the Van X glovebox.
My plan is to template it using 3mm cardboard, then redraw it in the computer to be laser cut.
View attachment 187141
View attachment 187142
View attachment 187143
I think you will need something stiffer than cardboard if going down the template route, whatever you use as a template should be the same thickness as the plastic sheet.
If it were simply a case of creating a cover on a sharp edged aperture it’s relatively easy as it’s possible to take an impression. The problem is that the dashboard top is radiused so taking an impression is out of the question.
Interesting thread: "deckelloses" Ablagefach Trendline
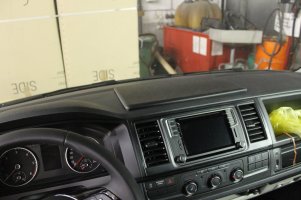
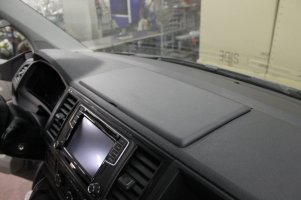
Unfortunately it looks like the person making these isn’t making them any more.


Unfortunately it looks like the person making these isn’t making them any more.
Update:
Templated using cardboard and taking a scribe from the outer line that goes around the edge of the hole. Then onto 2mm ABS.
The final will be 3mm as 2 is too flimsy. I’m hoping to be able to bend the material to match the contours of the dash as best I can.
Not sure about the textured ABS as you can see the repetition (tiling) in the texture. Might swap for Matt.
Just resting in place at the moment, still needs fixing with a hinge. I’ve cut the trim and removed the ridges from the back to create a smooth area to bond the hinge to.
Replacement trim is around a tenner if I balls that up.
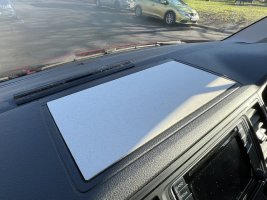
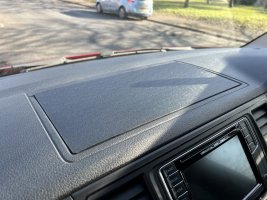
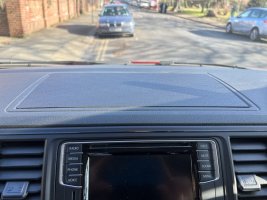
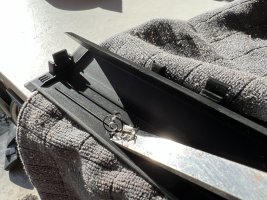


looks fantastic well done. so much more OEM than the Van XUpdate:
Templated using cardboard and taking a scribe from the outer line that goes around the edge of the hole. Then onto 2mm ABS.
The final will be 3mm as 2 is too flimsy. I’m hoping to be able to bend the material to match the contours of the dash as best I can.
Not sure about the textured ABS as you can see the repetition (tiling) in the texture. Might swap for Matt.
Just resting in place at the moment, still needs fixing with a hinge. I’ve cut the trim and removed the ridges from the back to create a smooth area to bond the hinge to.
Replacement trim is around a tenner if I balls that up.
View attachment 188353
View attachment 188354
View attachment 188355
View attachment 188356
Here's the template I made, you can use it to trace your templates.
I've added a halfway mark so if you only have an A4 printer you can print the 2 halves on separate sheets, then stick them together using that line to ensure it aligns correctly.
It's over size and will need cutting down on the hinge end.
I've added a halfway mark so if you only have an A4 printer you can print the 2 halves on separate sheets, then stick them together using that line to ensure it aligns correctly.
It's over size and will need cutting down on the hinge end.
Attachments
thank you!Here's the template I made, you can use it to trace your templates.
I've added a halfway mark so if you only have an A4 printer you can print the 2 halves on separate sheets, then stick them together using that line to ensure it aligns correctly.
It's over size and will need cutting down on the hinge end.
That looks good @bobbybasic 

@bobbybasic Looking great, how are you planning to open it?
@bobbybasic Looking great, how are you planning to open it?
Probably a hole like @DXX has done, but then as it will be an exact copy we will have to negotiate royalties. Maybe 1p every time I open it? I'll keep usage to a minimum.
I'm looking into potentially finishing the hole with some kind of grommet, or a matt black latch/pull maybe. I have a feeling I'll end up with just a hole.
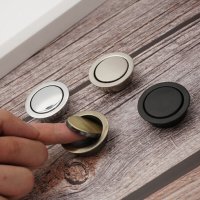
Do you think so? As an ex Industrial Modelmaker (prior to 3D printing) I find the printed stuff looks like it’s been whittled with a pen knife.A 3D printed version would be best if anyone has those mad skills and wants to get involved?
True. Although there are techniques for smoothing. I wouldn’t be so quick to write it off.
Looks mintUpdate:
Templated using cardboard and taking a scribe from the outer line that goes around the edge of the hole. Then onto 2mm ABS.
The final will be 3mm as 2 is too flimsy. I’m hoping to be able to bend the material to match the contours of the dash as best I can.
Not sure about the textured ABS as you can see the repetition (tiling) in the texture. Might swap for Matt.
Just resting in place at the moment, still needs fixing with a hinge. I’ve cut the trim and removed the ridges from the back to create a smooth area to bond the hinge to.
Replacement trim is around a tenner if I balls that up.
View attachment 188353
View attachment 188354
View attachment 188355
View attachment 188356
 I want one
Can I ask @bobbybasic , where did you get the dash plastic (the stippled piece) from please?
Similar threads
- Replies
- 1
- Views
- 340
- Replies
- 0
- Views
- 632
- Replies
- 5
- Views
- 1K
- Replies
- 12
- Views
- 3K

