Colinlp

Cabinet-maker
T6 Guru
Yes it is my second camper but the title of the thread was more in tune with Blur's "Song 2" WooHoo and all that or possibly I need my head checking!!

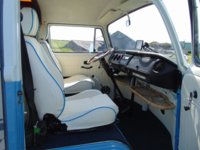
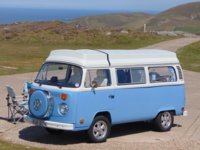
So for anyone who has not read my other posts on the forum this camper is to replace our beloved Type 2 Bay window which is currently for sale because we are looking after my mother who has dementia and we are basically housebound. The bay like to be used not just left sat there, also I have had to leave work to look after her so I need to consolidate my vehicles into one to save money as my sole income is a massive £62.70 a week carers allowance. so without further ado here is the old bay window that has served us so well
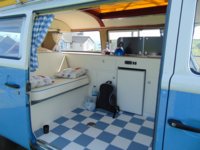
DSC00032.JPG
DSC00053.jpg

Once the decision had been made I found a T6 in the VW dealers in Llandudno Junctiom went to see it and bought it, she is a September 2015 102PS Highline with a Euro 6 engine

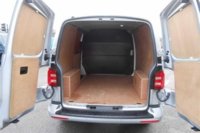
xxl_kfz45670714_kfz_45670714_1.jpg

xxl_kfz45836276_kfz_45836276_4.jpg

The first job was to rip the ply lining out, then remove the bulkhead (what a PITA that was) befor giving the inside a real good clean. I then ordered some 3.5mm ply for the panels and some 12mm ply for the floor. I used the existing panels as a template for the new ones using a bearing guided router cutter to follow the shape exactly.

We had eventually decided to have lowline cabinets rather than a wardrobe similar to what we have and like in our Bay. This obviously meant that we could have windows all round, my wife also wanted light green glass rather than the more usual 70-80% dark tint, these we eventually found and ordered. We also ordered a Streamline Easylift R&R bed (only 2 of us and we didn't need an M1 tested one), some blue 4 way stretch carpet lining, a Virtfrigio fridge and a Smev 9222 sink/hob, insulation and some Altro non slip flooring.
 
Thank you :thumbsup:

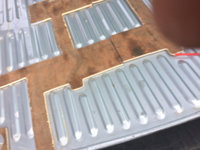
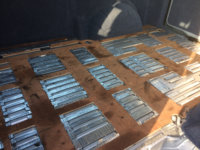
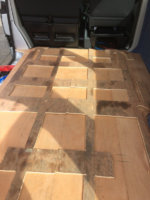
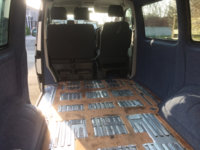
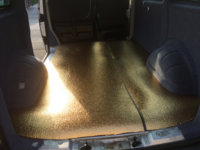
Once everything arrived the first job was to sort out the sub floor, I used the old 9mm floor to make a one piece filler instead of using lots of individual bits. The idea was hopefully the one piece construction (actually 2 pieces) would be more rigid and help reduce noise, secondly it could be placed on top of the actual floor to trace around with a pencil to make it easy to know where to screw down. I stuck the sub floor down with Sikaflex polyurethane adhesive, after it was set I applied the sticky back insulation in the low spaces. At this point I went for a drive and the noise reduction was remarkable, that should make long journeys more pleasant.IMG_2540.JPG
IMG_2545.JPG

IMG_2544.JPG

The next stage was getting the windows in and the carpet lining done. I wasn't looking forward to this bit so for the first effort I decided to have a crack at the barn doors first as they didn't need carpet lining. I masked the van up, drilled holes to mark the corner radii then cut the panels out with a jigsaw, filed the burrs clean and primed the raw edges with zinc paint and finally with primer and lacquer. The rubber edge trim was applied then it was off to re read the window bonding instructions. Once the primer and activator had been applied I started to apply the adhesive using a standard mastic gun..... Big mistake, holy "insert rude word here" it was heavy going, I bought an air powered one for the rest of the windows, bargain!! In the end all was well and we had two windows in the back of the van.

Now on to the side windows and the carpet lining. First I cut out the panels, primed etc and then moved on to the carpet lining. I was dreading this bit but in the end it turned out to be dead easy, a hair drier to warm the carpet up when it gets a bit tight and bingo. Once in I replaced the door seals and knocked on the rubber window edging over carpet and metal, an old RAC card made that job a lot easier. Windows bonded on and the job was a good un, what was I worrying about?

IMG_2546.JPG

IMG_2550.JPG

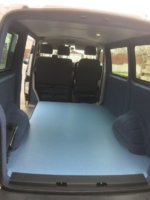
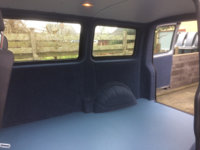
We carpeted the ply panels after fitting the invisible trim clips and fitted them, put in a layer of insulation over the sub floor, fitted and screwed down the floor and finally laid the Altro
IMG_2553.JPG

IMG_2555.JPG

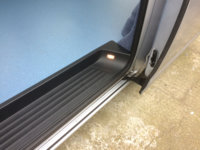
We also bought a Kombi step set to tidy the doorways up

IMG_2554.JPG
 
Looking good. Would love to have the time and £££ to do this. Will have to wait till the kids move out and can convert the velle...
 
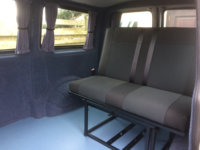
Fitting the Streamline bed was simplicity itself, just a matter of dropping the spare wheel and drilling and bolting through the load spreaders, the whole job took about an hour and most of that was waiting for paint to dry

IMG_2556.JPG

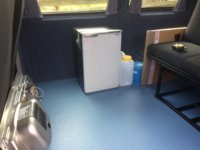
Next I worked out the outer edge of the cabinets and laid a strip of masking tape to mark it. We put the fridge and water/gas in position to work out the position they would be in the van to allow access.

IMG_2560.JPG

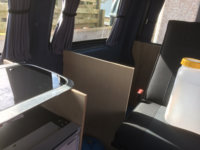
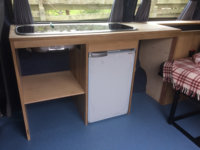
Then using the cardboard packaging from the windows I made templates for the cupboard uprights. Rather than use lightweight ply which comes with a foil finish we wanted to use a real wood veneer that I had in the workshop (these are hand cut veneers 3mm thick that were left over from a church suit of furniture I made many years ago); to act as a carrier for these we used birch ply which is only marginally heavier than the lightweight ply. Using the cardboard template we cut out the uprights and had a test fit

IMG_2561.JPG

IMG_2563.JPG

The ply was then veneered sanded and sprayed and the cabinets put together, sorry no picture of this bit but it's hardly interesting stuff

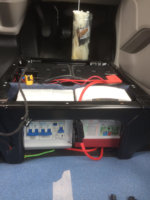
Just before fitting I put in the leisure battery etc under the drivers seat, what a PITA that was fitting it all in but it's done

IMG_2566.JPG

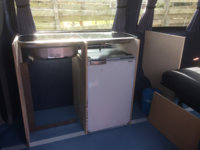
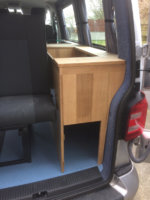
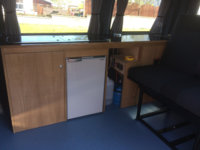
Now we could fit the cabinets

IMG_2572.JPG

IMG_2571.JPG

IMG_2583.JPG


I can't upload any more images so, next post
 
IMG_2585.JPG

That's how she stands as of today, the panels for the gas locker door and the drawer are currently in the veneer press overnight

the gas is connected up along with the electrics

IMG_2579.JPG

Finally for now this is the van from the outside, unlowered sporting the original 16" wheels

IMG_2590.JPG

IMG_2588.JPG

I'll keep the thread updated as I go now
 
Thank you @Colinlp for producing this thread dedicated to your conversion project :thumbsup: as it deserves to be seen as an entity and show what can be done with time, patience, application and a willingness to give it a go. As @Thogg's conversion thread is a tribute to the work of @slidepods, so this thread is a tribute to your expertise, tenacity and determination to do the best possible job even though you are using some techniques and skills for the first time.
You should certainly consider undertaking some conversion work for others from home as clearly you have a flare for this type of thing.
A very worthwhile project and thank you for allowing us all the opportunity to share your efforts :):thumbsup:. I look forward to your next progress posts.
 
Great 2 campers you have (will have). Really interesting watching the conversion too. Look forward to seeing the rest :)
 
Back
Top