Audio upgrade Stage-1 . . . . BLAM Relax 200RS speakers from Skipton.
As the title says, so i thought i would bring you along for the ride . . . . . . . . .
stage 1 was to sound deaden the doors and door cards and fit the new 8" speakers and tweeters.
stage2 will be fitting the amps and sub . . . but for now lets have a look at stage1 . . . . . .
**************
.
Audio Upgrade Stage-1 . . . . Blam Relax 200rs Speakers From Skipton.
.
Audio Upgrade Stage-2 - Vibe Micro Amplifier Plug & Play - How I Done It -
.
Audio Upgrade Stage-3 - Vibe Micro Sub Amp + Jbl Sub - How I Done It -
.
Audio Upgrade Stage-4 - Kicker 15" Sub + Kenwood Amps - How I Done It -
.
**************
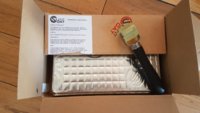
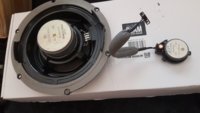
These are the speaker kit from Skipton Car Audio. (8" 100W woofer plus tweeters and crossover)(plus new mounting rings)(and a set of OEM speaker connectors)

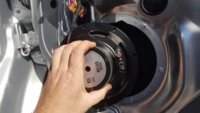
The first this was to remove the door cards and drill out the rivets holding the OEM speaker/pods inplace. A simple enough job providing you had a couple of trim tools and some decent drill bits for the rivets. . . . . plus a few Torx bits for the bolts etc. oh and a spanner for the bottom 90deg twixt fixings.
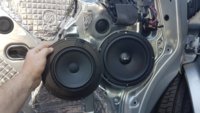
The rivet mounting holes lined up nicely with the holes in the new collars, but we ended up just fitting new self drilling screws to mount the new speakers and mountings. . . . . you can see the difference in speaker sizes clearly here.
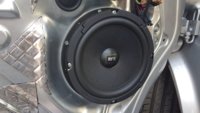
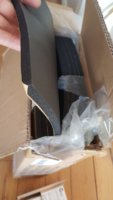
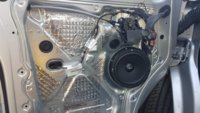
while the old speakers were out we started the sound deadening with, 1x layer of dynamat type mats stuck to the outer skin behind the speaker port and then another layer of dense foam insulation over the top. . . . . . .just had to keep checking that the window mechanism was still free to move. . . . if you wanted to cover the whole outer skin you would need to remove the inner panel, but we wanst that bothered and were happy to just cover as far as we could through the speaker opening.
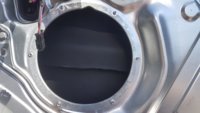
The next thing was to cover the steel inner door panel with a layer of dynamat sound deadening, i was easy to cut into shape with sharp scissors and stuck on nicely with this hot weather we are having,... . . . .
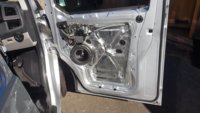
next was to fit some dense foam to the back of the door card itself . . . . maybe overkill . . . but i was having fun so just kept on sticking . . . .
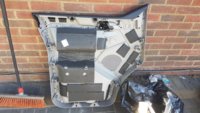
doors now done it was time to move onto the tweeters in the A-pillar . . .
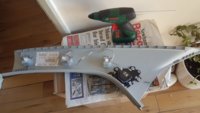
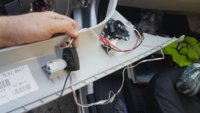
the OEM tweeters popped out easy enough once the plastic tabs were cut off . . . . but didn't realize that the tweeters had a different connection on them than the woofers, . . . . so ended up cutting off the old tweeter piece of loom and crimped onto the new tweeter x-over . . .
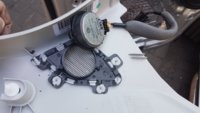
the new tweeters lined up nicely, and with a quick go on the hot-melt glue-gun they were firmly fixed . . .
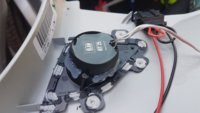
so put all the panels back together and time for a test.....
The results?
well they sound awesome, even though its still just the head-unit driving them. In stage 2 we have a new 100w amp to run them from. The bass and low-end is massively improved with a nice tight punchy mid-range. The tweeters and top-end clear and precise with great stereo separation.
The sound deadening has made other improvements too, the road noise has been reduced now with a more subtle low-end rumble than before and the door closing sound has nice and reassuring thud when closed compared to the previous tin-can-van type noise. we have a load of sound deadening left over and plan to use it on the roof of the cab the next time the roof trim so down . . . .
Other things to note were that we have a full height bulkhead with no window, this had previously been carpeted on the back side which helped massivley to the road noise preiously . .
Also after we was finished we done a full-van-scan on the Autel Maxisys which showed some error codes logged relating both the woofer speakers being disconnected! obviously set a code when we had the ignition switched on to test the window function wasn't impeaded.... these codes all cleared down with no problem . . . . which was good as the new speakers are rated at 3ohms where as the OEM speakers are the standard 4ohms, so all is withing the range for generating a low resistance fault code. All good.
Total time ? . . . about 3 hours and 6 bud lights =]
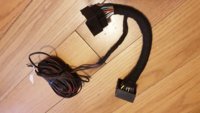
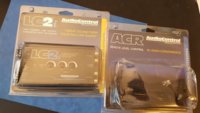
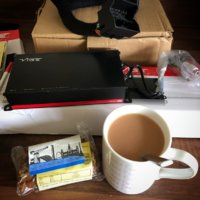
stage2 will be soon, using the Skipton audio radio loom so we dont need to cut any factory cables and using a AudioControl LC2i with high level inputs which will also generate a remote Amp switch on feed. Then of course the amps and sub . . . . . but thats for another day.
+++edit:
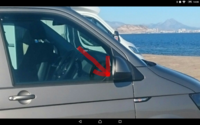
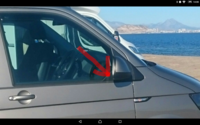
water on step from deeper speakers:
yes . . .
@Absolut5 gave me this advise. ( top man !! )
+++
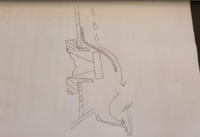
get another sheet of that sound deadening stuff . .
stick it of the back of the door carrier (inside the door void)
so it creates a "rain shield" and diverts any rain droplets back into the middle of the door void.
that will drip to the bottom of the inner door skin, then exit via the drain hols at the bottom of the door.
just use one full sheet, only peel off the backing at the top where it sticks to the door, that way it wont stick to the back of the speaker.
we are just looking to make a rain canopy for the speaker driver,
rough sketch bellow.
+++
+++
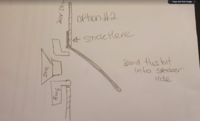
this is option 2..
stick the sheet on the front of the door . . .
and push it into the speaker hole.
then mount the speaker ring and speaker over the top...
again creating a rain shield for the speaker,
to divert any water drops away from the speaker.
+++
....
As the title says, so i thought i would bring you along for the ride . . . . . . . . .
stage 1 was to sound deaden the doors and door cards and fit the new 8" speakers and tweeters.
stage2 will be fitting the amps and sub . . . but for now lets have a look at stage1 . . . . . .
**************
.
Audio Upgrade Stage-1 . . . . Blam Relax 200rs Speakers From Skipton.
.
Audio Upgrade Stage-2 - Vibe Micro Amplifier Plug & Play - How I Done It -
.
Audio Upgrade Stage-3 - Vibe Micro Sub Amp + Jbl Sub - How I Done It -
.
Audio Upgrade Stage-4 - Kicker 15" Sub + Kenwood Amps - How I Done It -
.
**************
These are the speaker kit from Skipton Car Audio. (8" 100W woofer plus tweeters and crossover)(plus new mounting rings)(and a set of OEM speaker connectors)

The first this was to remove the door cards and drill out the rivets holding the OEM speaker/pods inplace. A simple enough job providing you had a couple of trim tools and some decent drill bits for the rivets. . . . . plus a few Torx bits for the bolts etc. oh and a spanner for the bottom 90deg twixt fixings.

The rivet mounting holes lined up nicely with the holes in the new collars, but we ended up just fitting new self drilling screws to mount the new speakers and mountings. . . . . you can see the difference in speaker sizes clearly here.

while the old speakers were out we started the sound deadening with, 1x layer of dynamat type mats stuck to the outer skin behind the speaker port and then another layer of dense foam insulation over the top. . . . . . .just had to keep checking that the window mechanism was still free to move. . . . if you wanted to cover the whole outer skin you would need to remove the inner panel, but we wanst that bothered and were happy to just cover as far as we could through the speaker opening.

The next thing was to cover the steel inner door panel with a layer of dynamat sound deadening, i was easy to cut into shape with sharp scissors and stuck on nicely with this hot weather we are having,... . . . .

next was to fit some dense foam to the back of the door card itself . . . . maybe overkill . . . but i was having fun so just kept on sticking . . . .

doors now done it was time to move onto the tweeters in the A-pillar . . .
the OEM tweeters popped out easy enough once the plastic tabs were cut off . . . . but didn't realize that the tweeters had a different connection on them than the woofers, . . . . so ended up cutting off the old tweeter piece of loom and crimped onto the new tweeter x-over . . .

the new tweeters lined up nicely, and with a quick go on the hot-melt glue-gun they were firmly fixed . . .

so put all the panels back together and time for a test.....
The results?
well they sound awesome, even though its still just the head-unit driving them. In stage 2 we have a new 100w amp to run them from. The bass and low-end is massively improved with a nice tight punchy mid-range. The tweeters and top-end clear and precise with great stereo separation.
The sound deadening has made other improvements too, the road noise has been reduced now with a more subtle low-end rumble than before and the door closing sound has nice and reassuring thud when closed compared to the previous tin-can-van type noise. we have a load of sound deadening left over and plan to use it on the roof of the cab the next time the roof trim so down . . . .
Other things to note were that we have a full height bulkhead with no window, this had previously been carpeted on the back side which helped massivley to the road noise preiously . .
Also after we was finished we done a full-van-scan on the Autel Maxisys which showed some error codes logged relating both the woofer speakers being disconnected! obviously set a code when we had the ignition switched on to test the window function wasn't impeaded.... these codes all cleared down with no problem . . . . which was good as the new speakers are rated at 3ohms where as the OEM speakers are the standard 4ohms, so all is withing the range for generating a low resistance fault code. All good.
Total time ? . . . about 3 hours and 6 bud lights =]
stage2 will be soon, using the Skipton audio radio loom so we dont need to cut any factory cables and using a AudioControl LC2i with high level inputs which will also generate a remote Amp switch on feed. Then of course the amps and sub . . . . . but thats for another day.
+++edit:
water on step from deeper speakers:
yes . . .
@Absolut5 gave me this advise. ( top man !! )
+++
get another sheet of that sound deadening stuff . .
stick it of the back of the door carrier (inside the door void)
so it creates a "rain shield" and diverts any rain droplets back into the middle of the door void.
that will drip to the bottom of the inner door skin, then exit via the drain hols at the bottom of the door.
just use one full sheet, only peel off the backing at the top where it sticks to the door, that way it wont stick to the back of the speaker.
we are just looking to make a rain canopy for the speaker driver,
rough sketch bellow.
+++

+++
this is option 2..
stick the sheet on the front of the door . . .
and push it into the speaker hole.
then mount the speaker ring and speaker over the top...
again creating a rain shield for the speaker,
to divert any water drops away from the speaker.
+++

....
Last edited:

